Crochet Braided Infinity Scarf

This was another Christmas gift. Surprise!

This one is fairly easy to do.

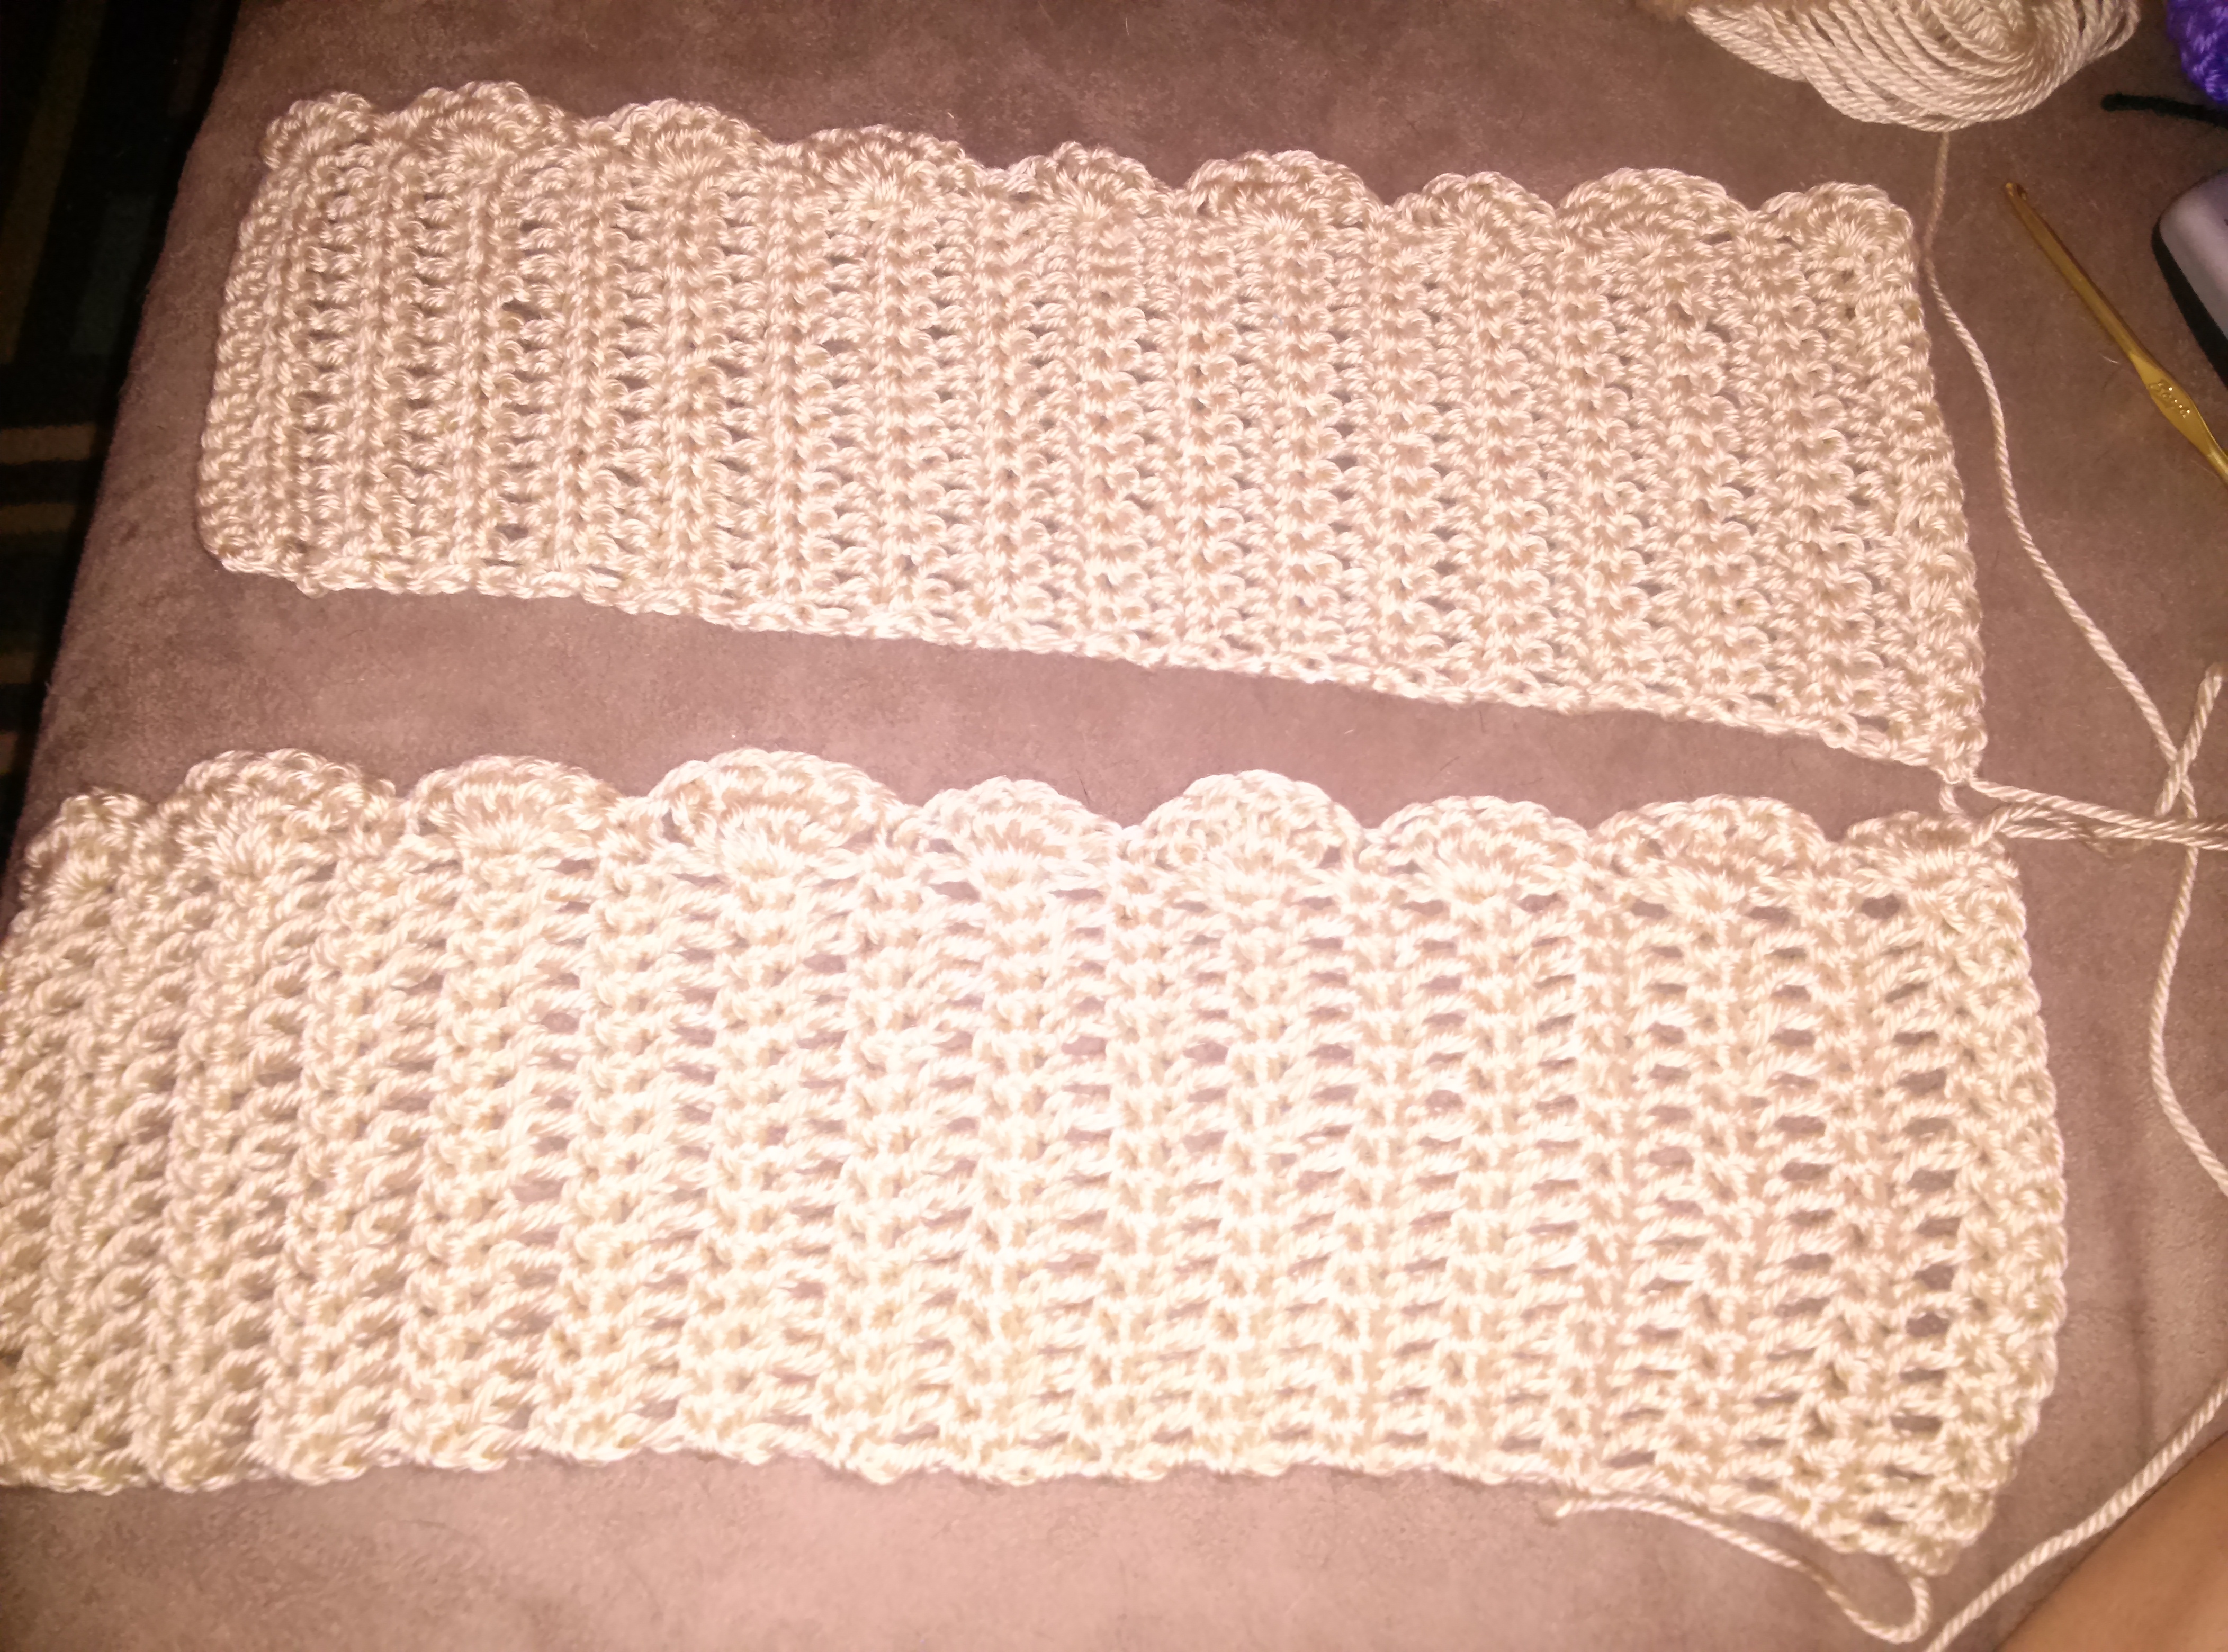
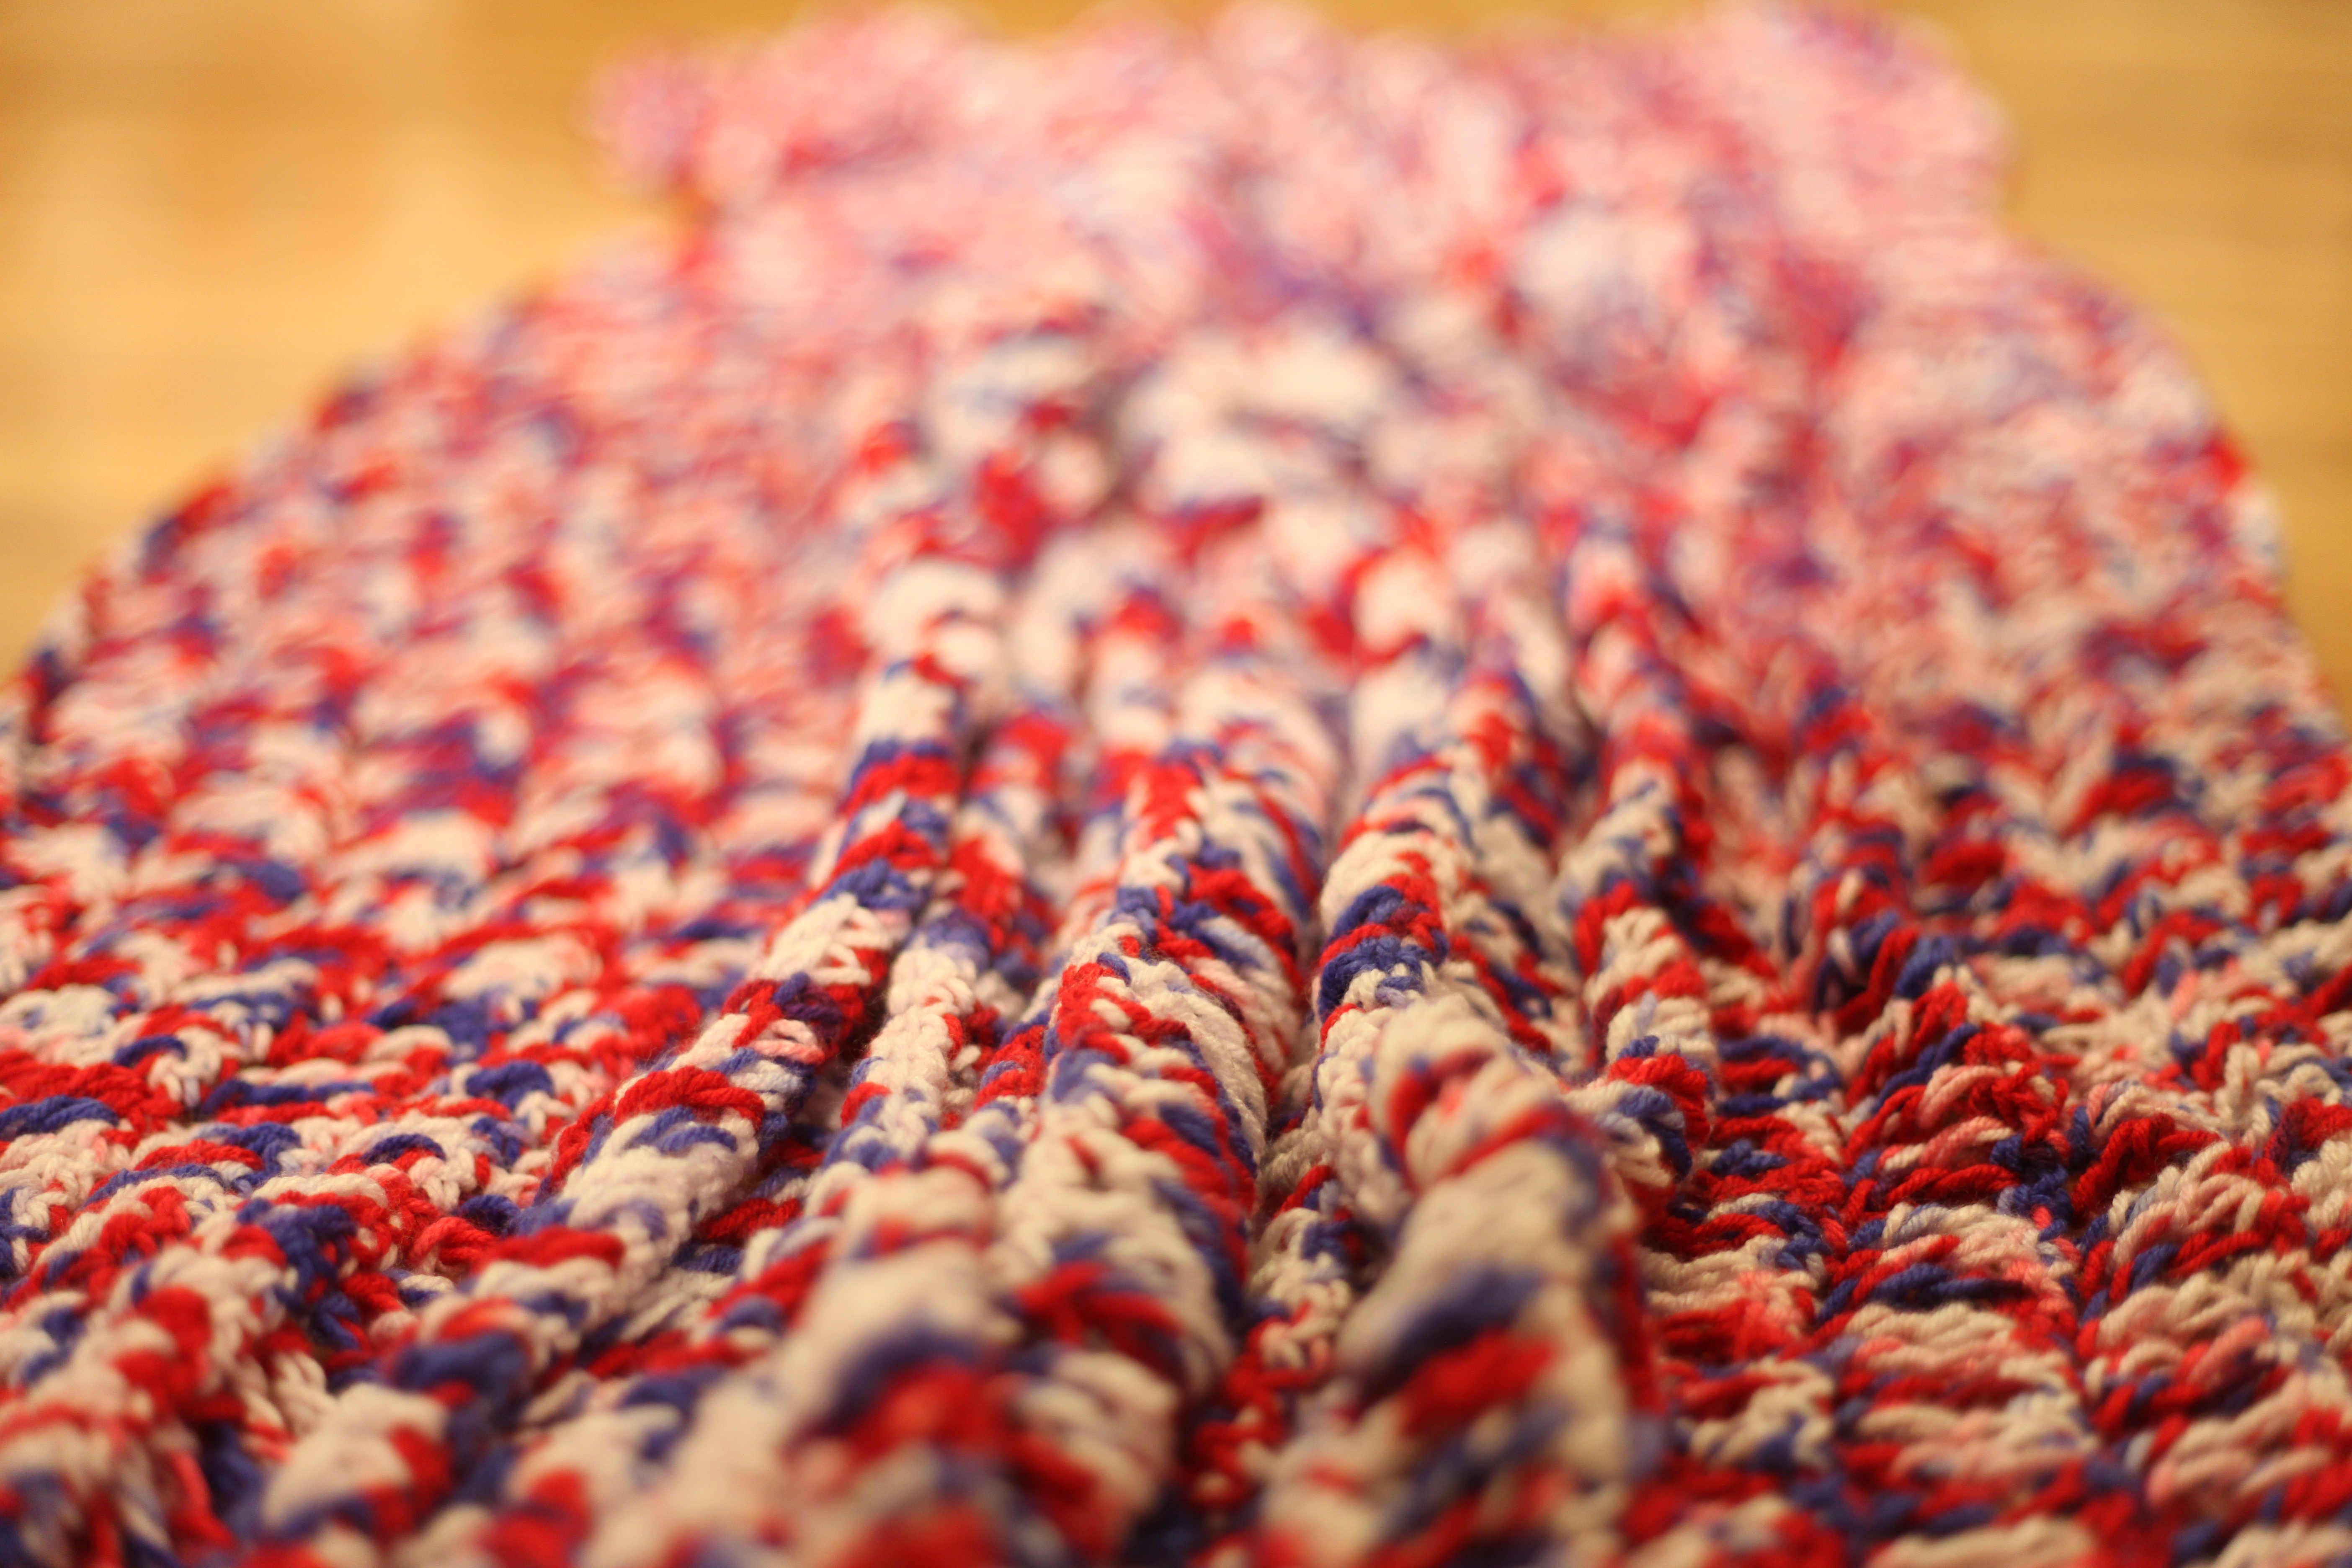
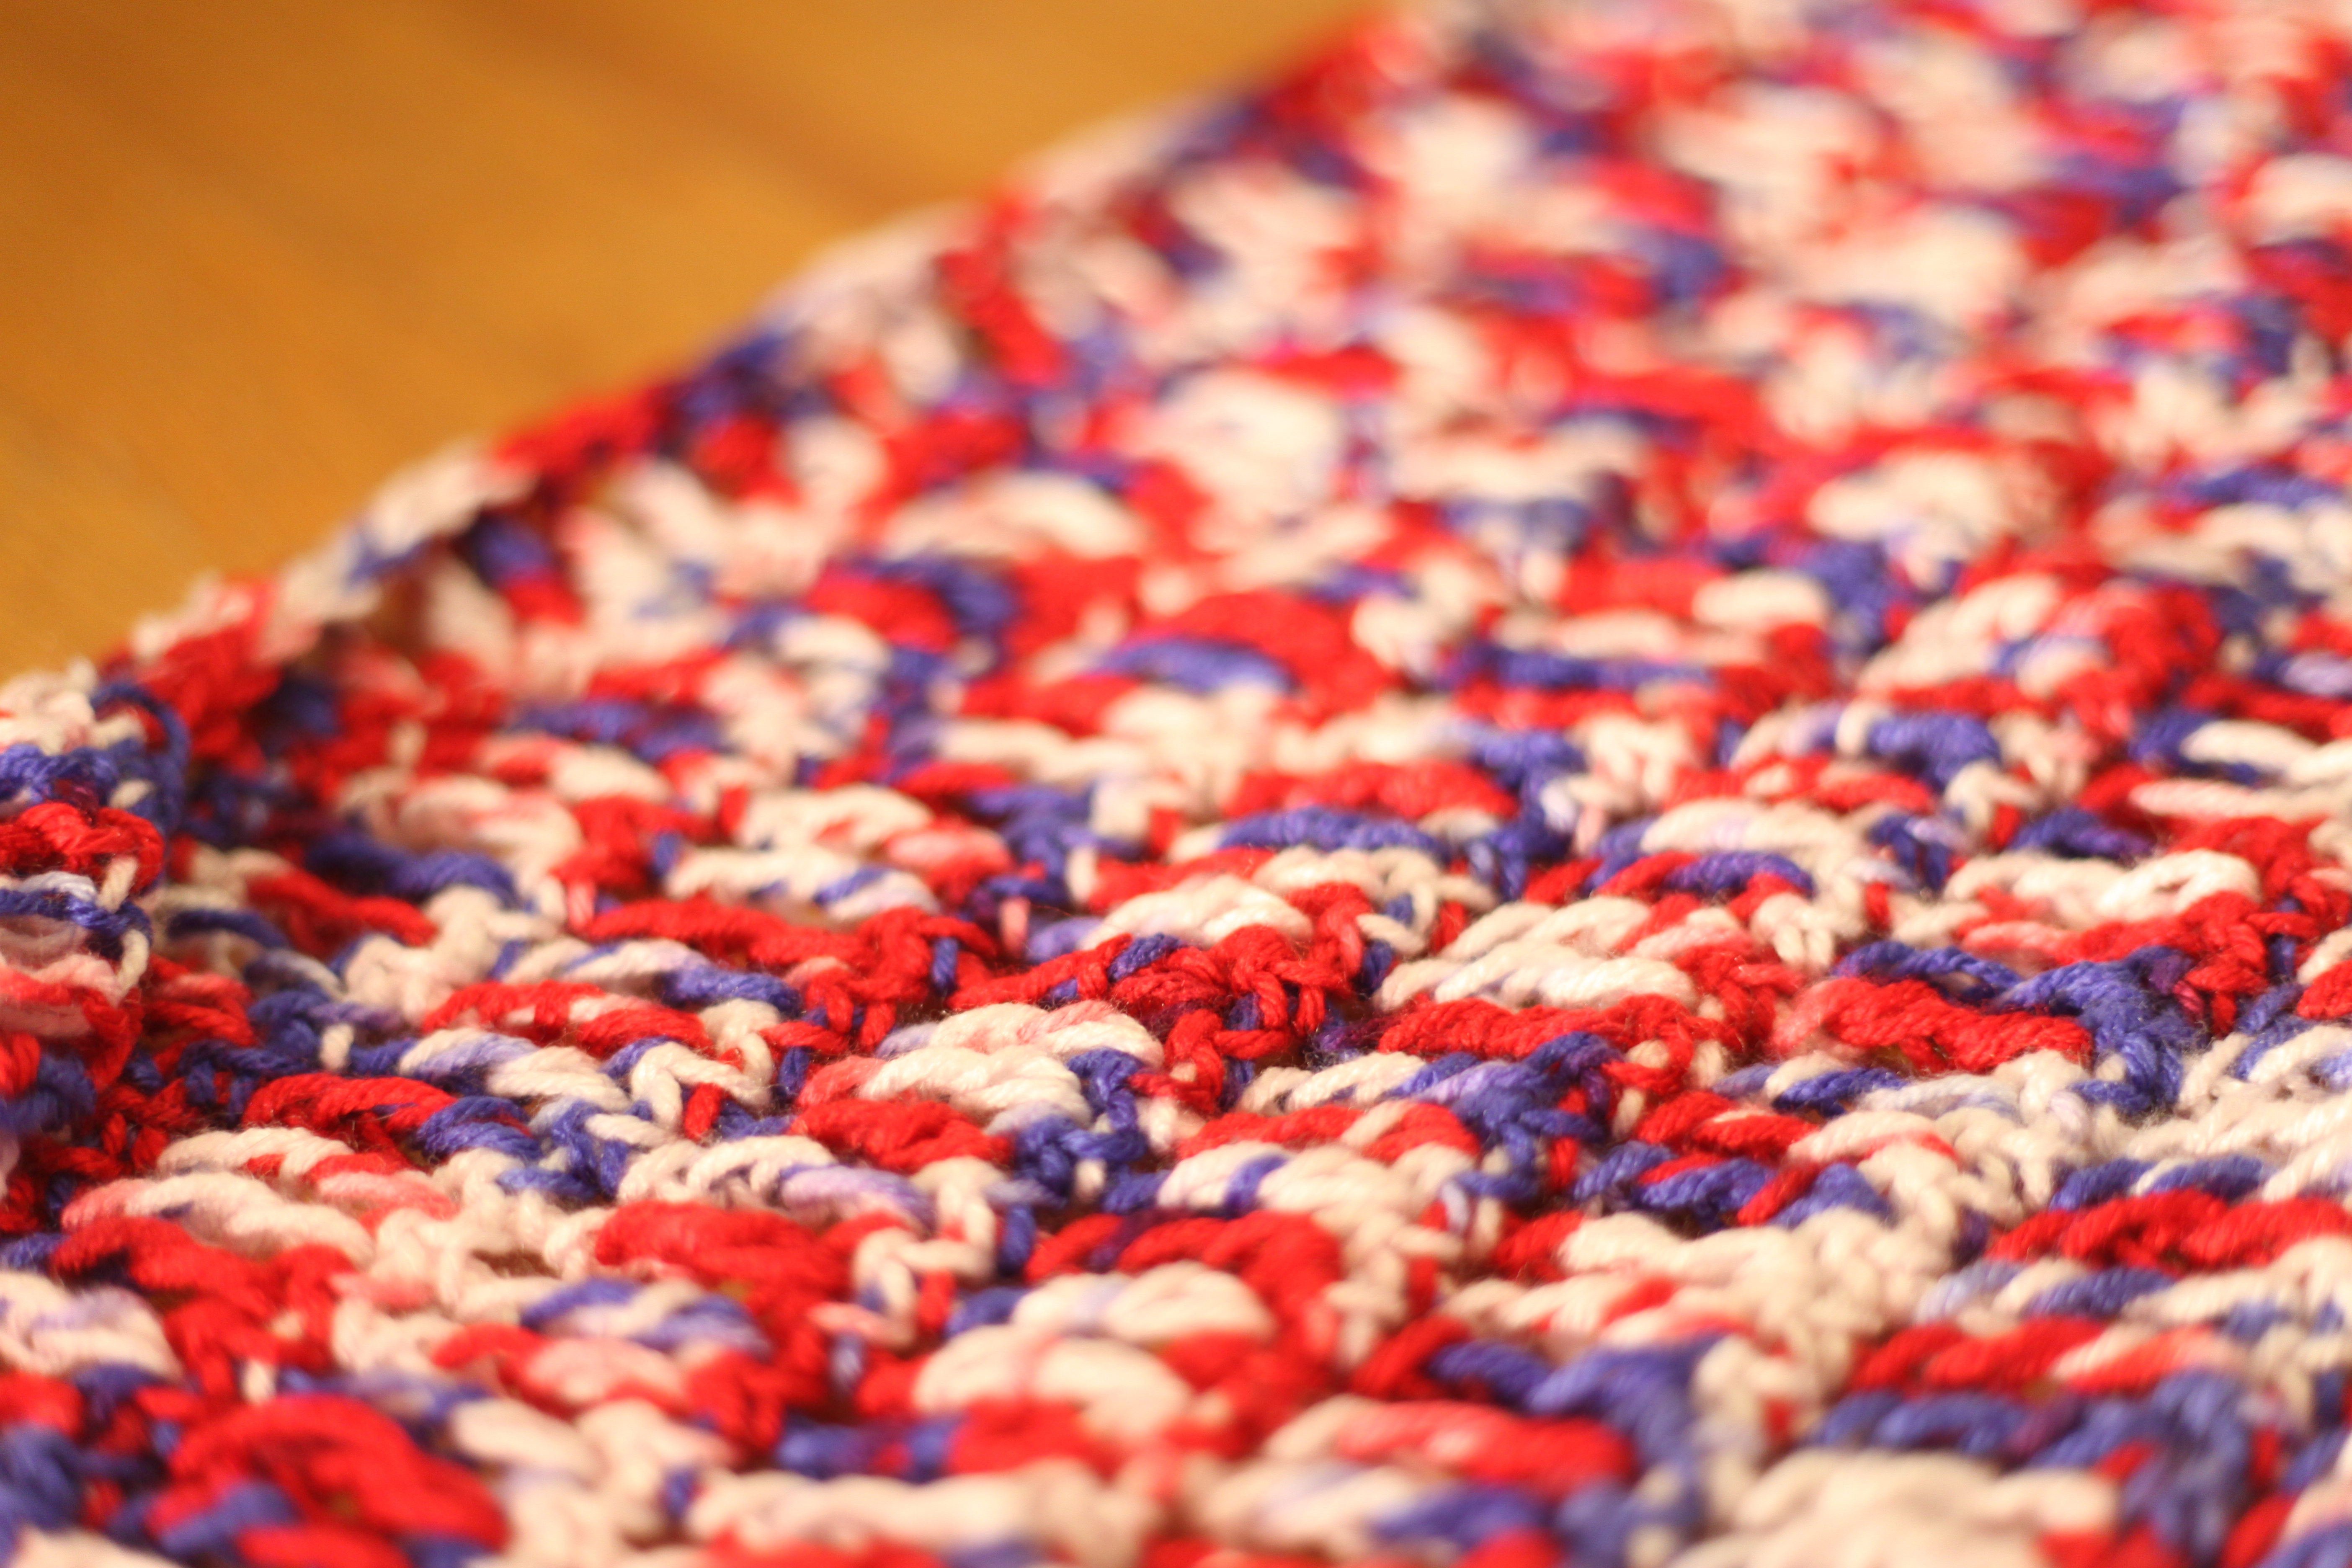
I used two colors of yarn and did a single crochet stitch with a medium hook.

First I crocheted three strips of the same length. I did not count perfectly the number of rows. I just eyeballed the same length.

2013-12-19 19.49.28

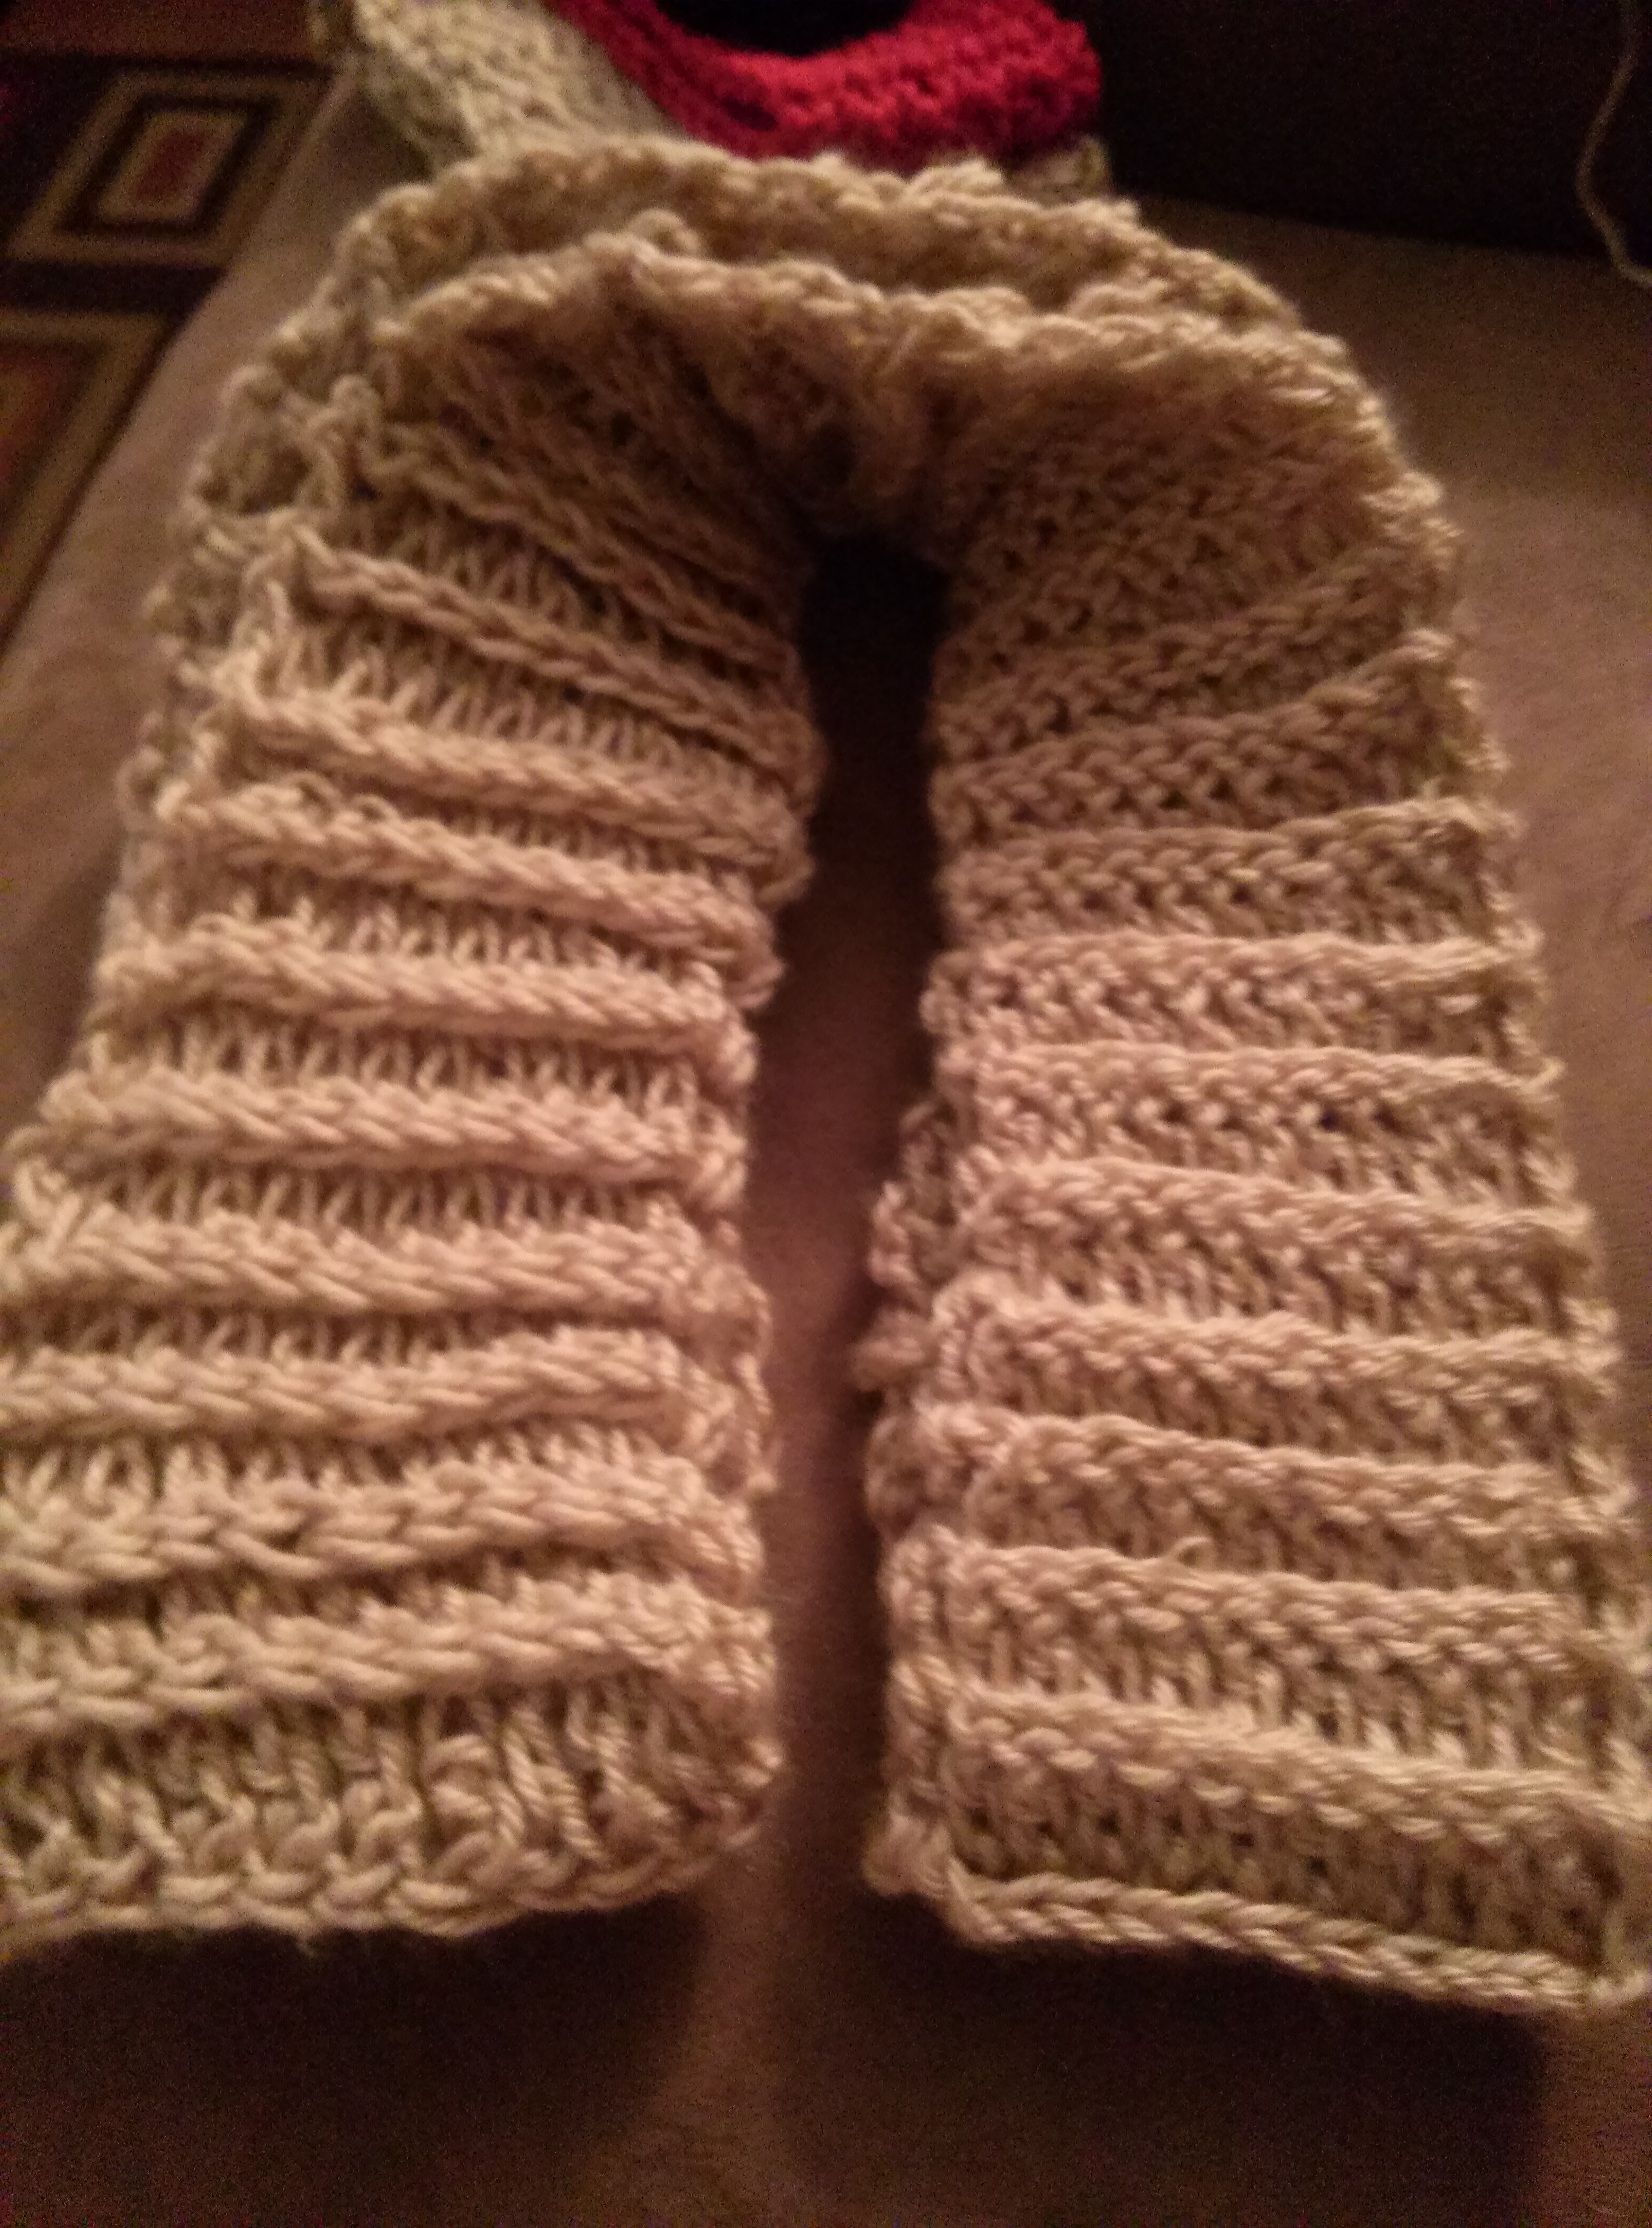
Next I braided the three strips together. You will want to do it fairly tight because it will loosen up once it is done. The picture below is too loose, so make sure you do it tighter. I took me a couple braids to get it to the thickness I wanted. Also it might be handy to either have clamps or a person to hold it while you braid.

2013-12-19 19.53.32

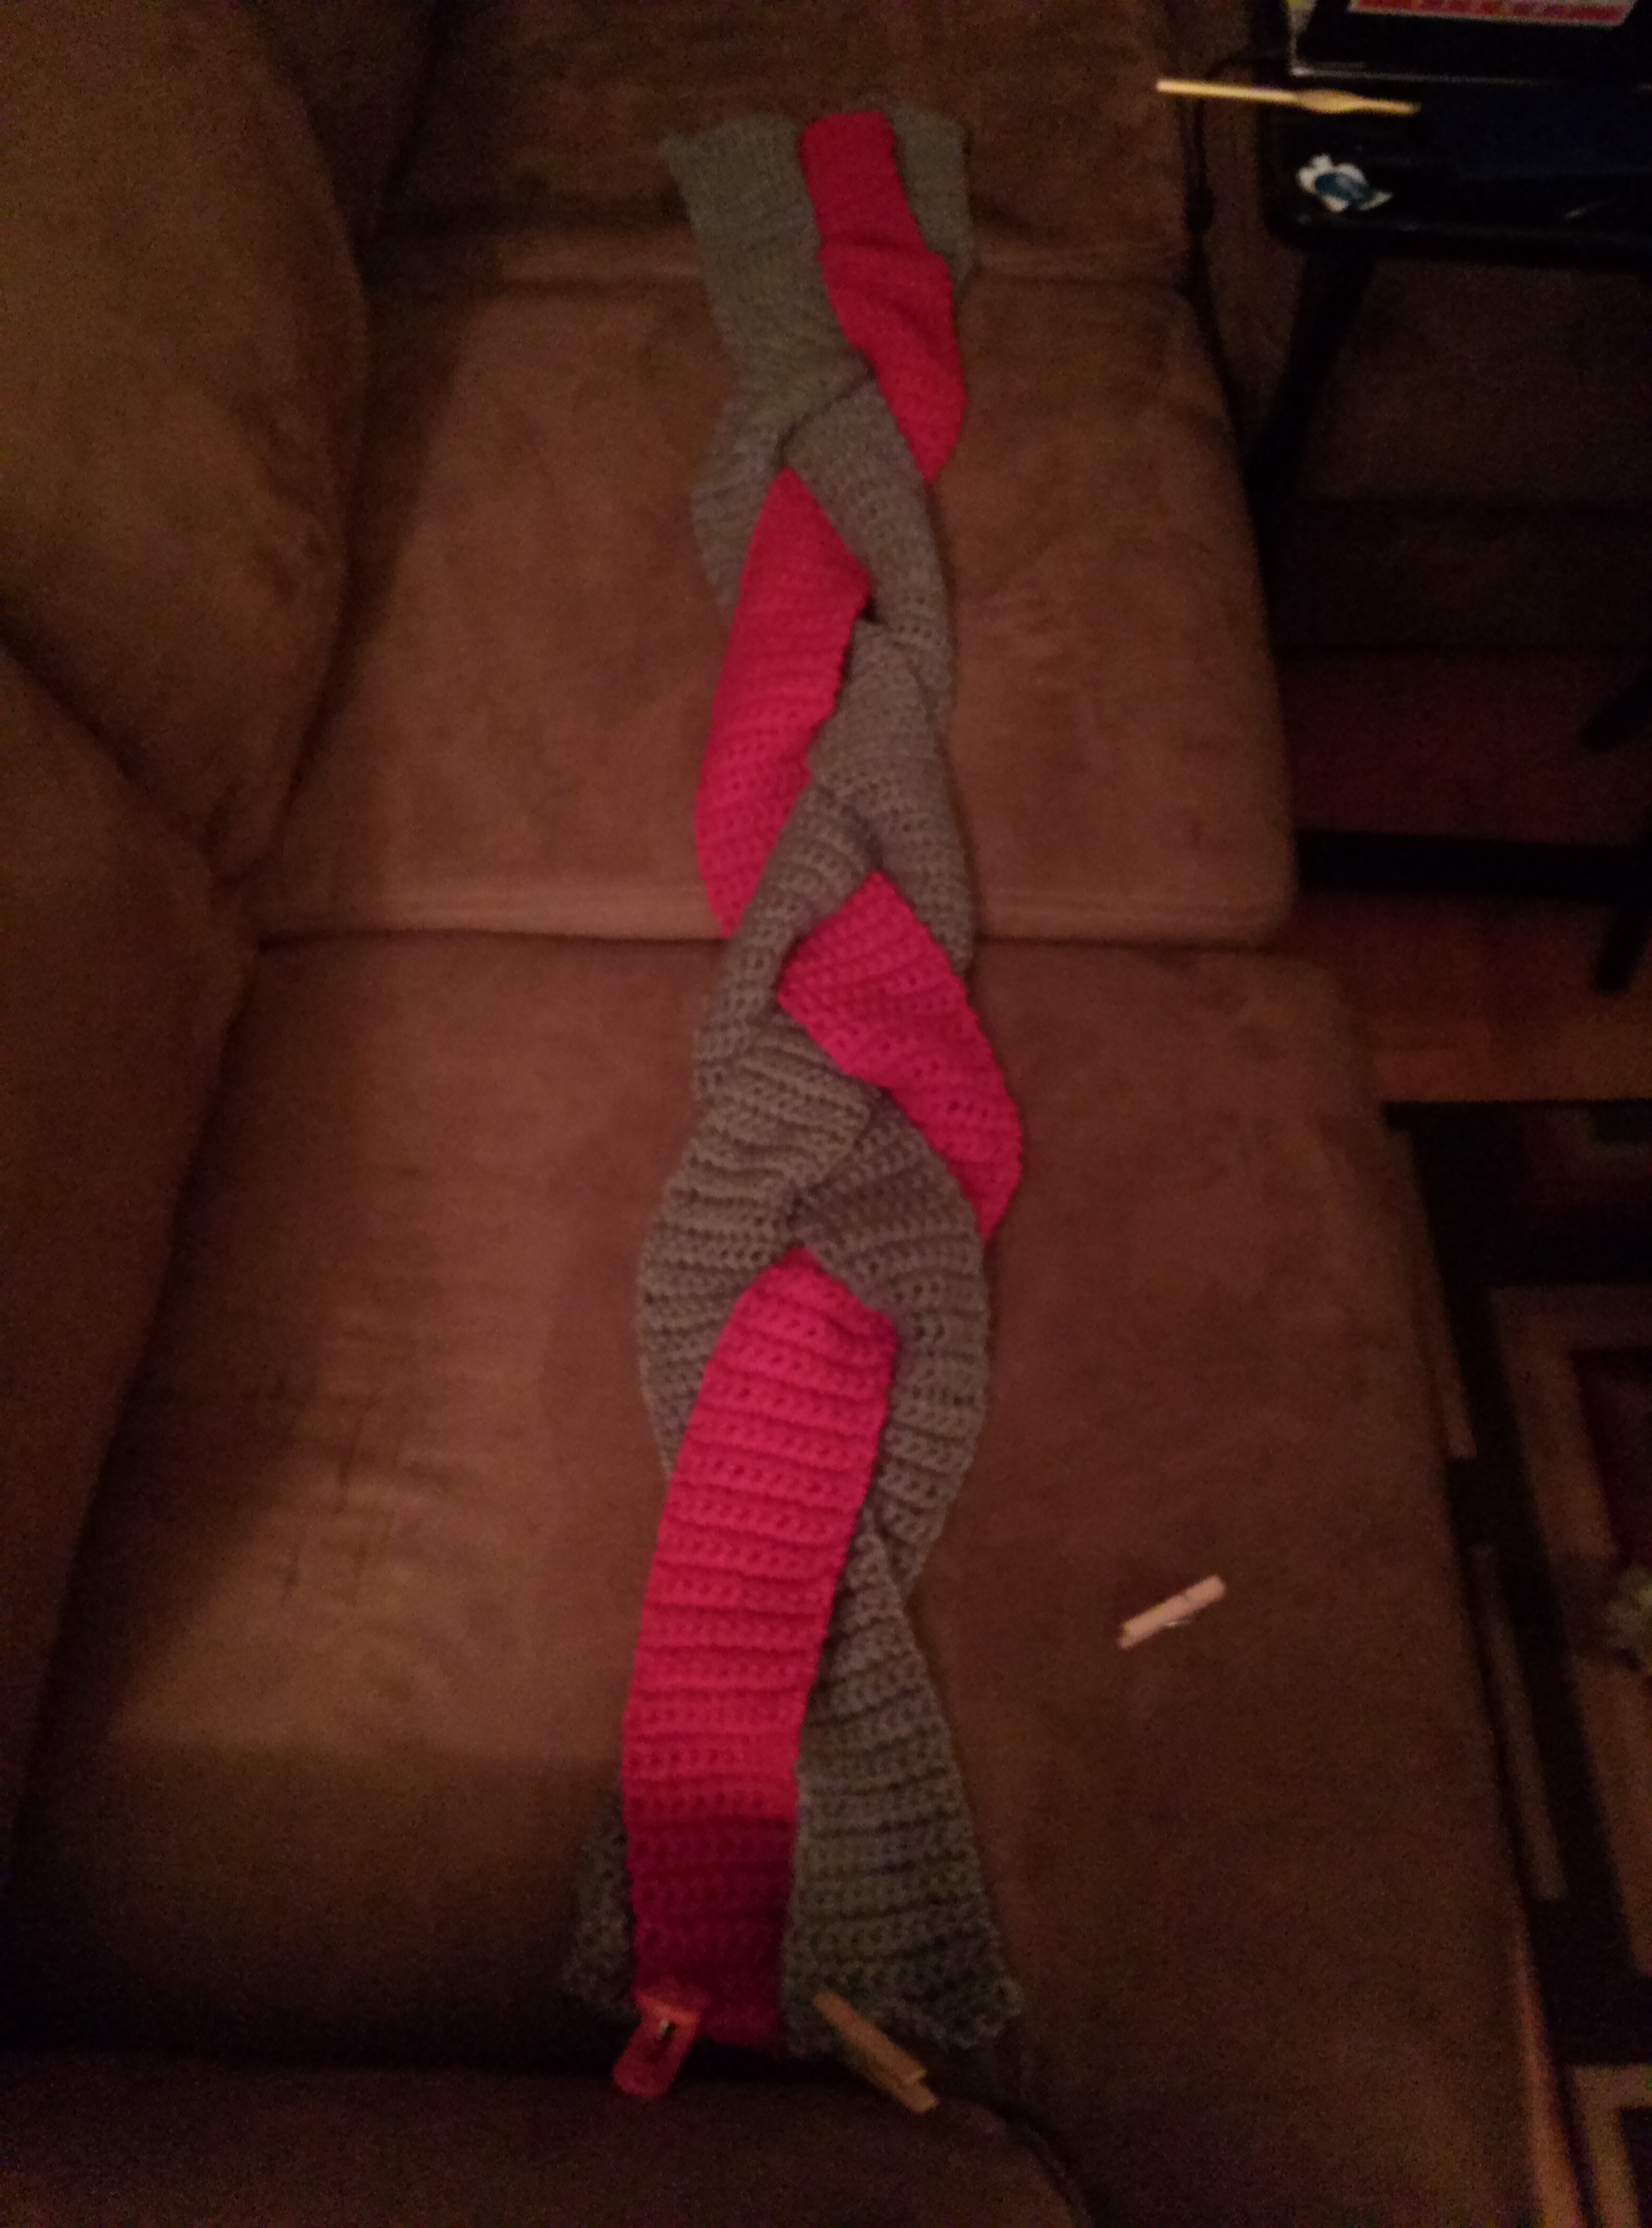
It will look a little sloppy at this point, but don’t worry once you are done it will look great!

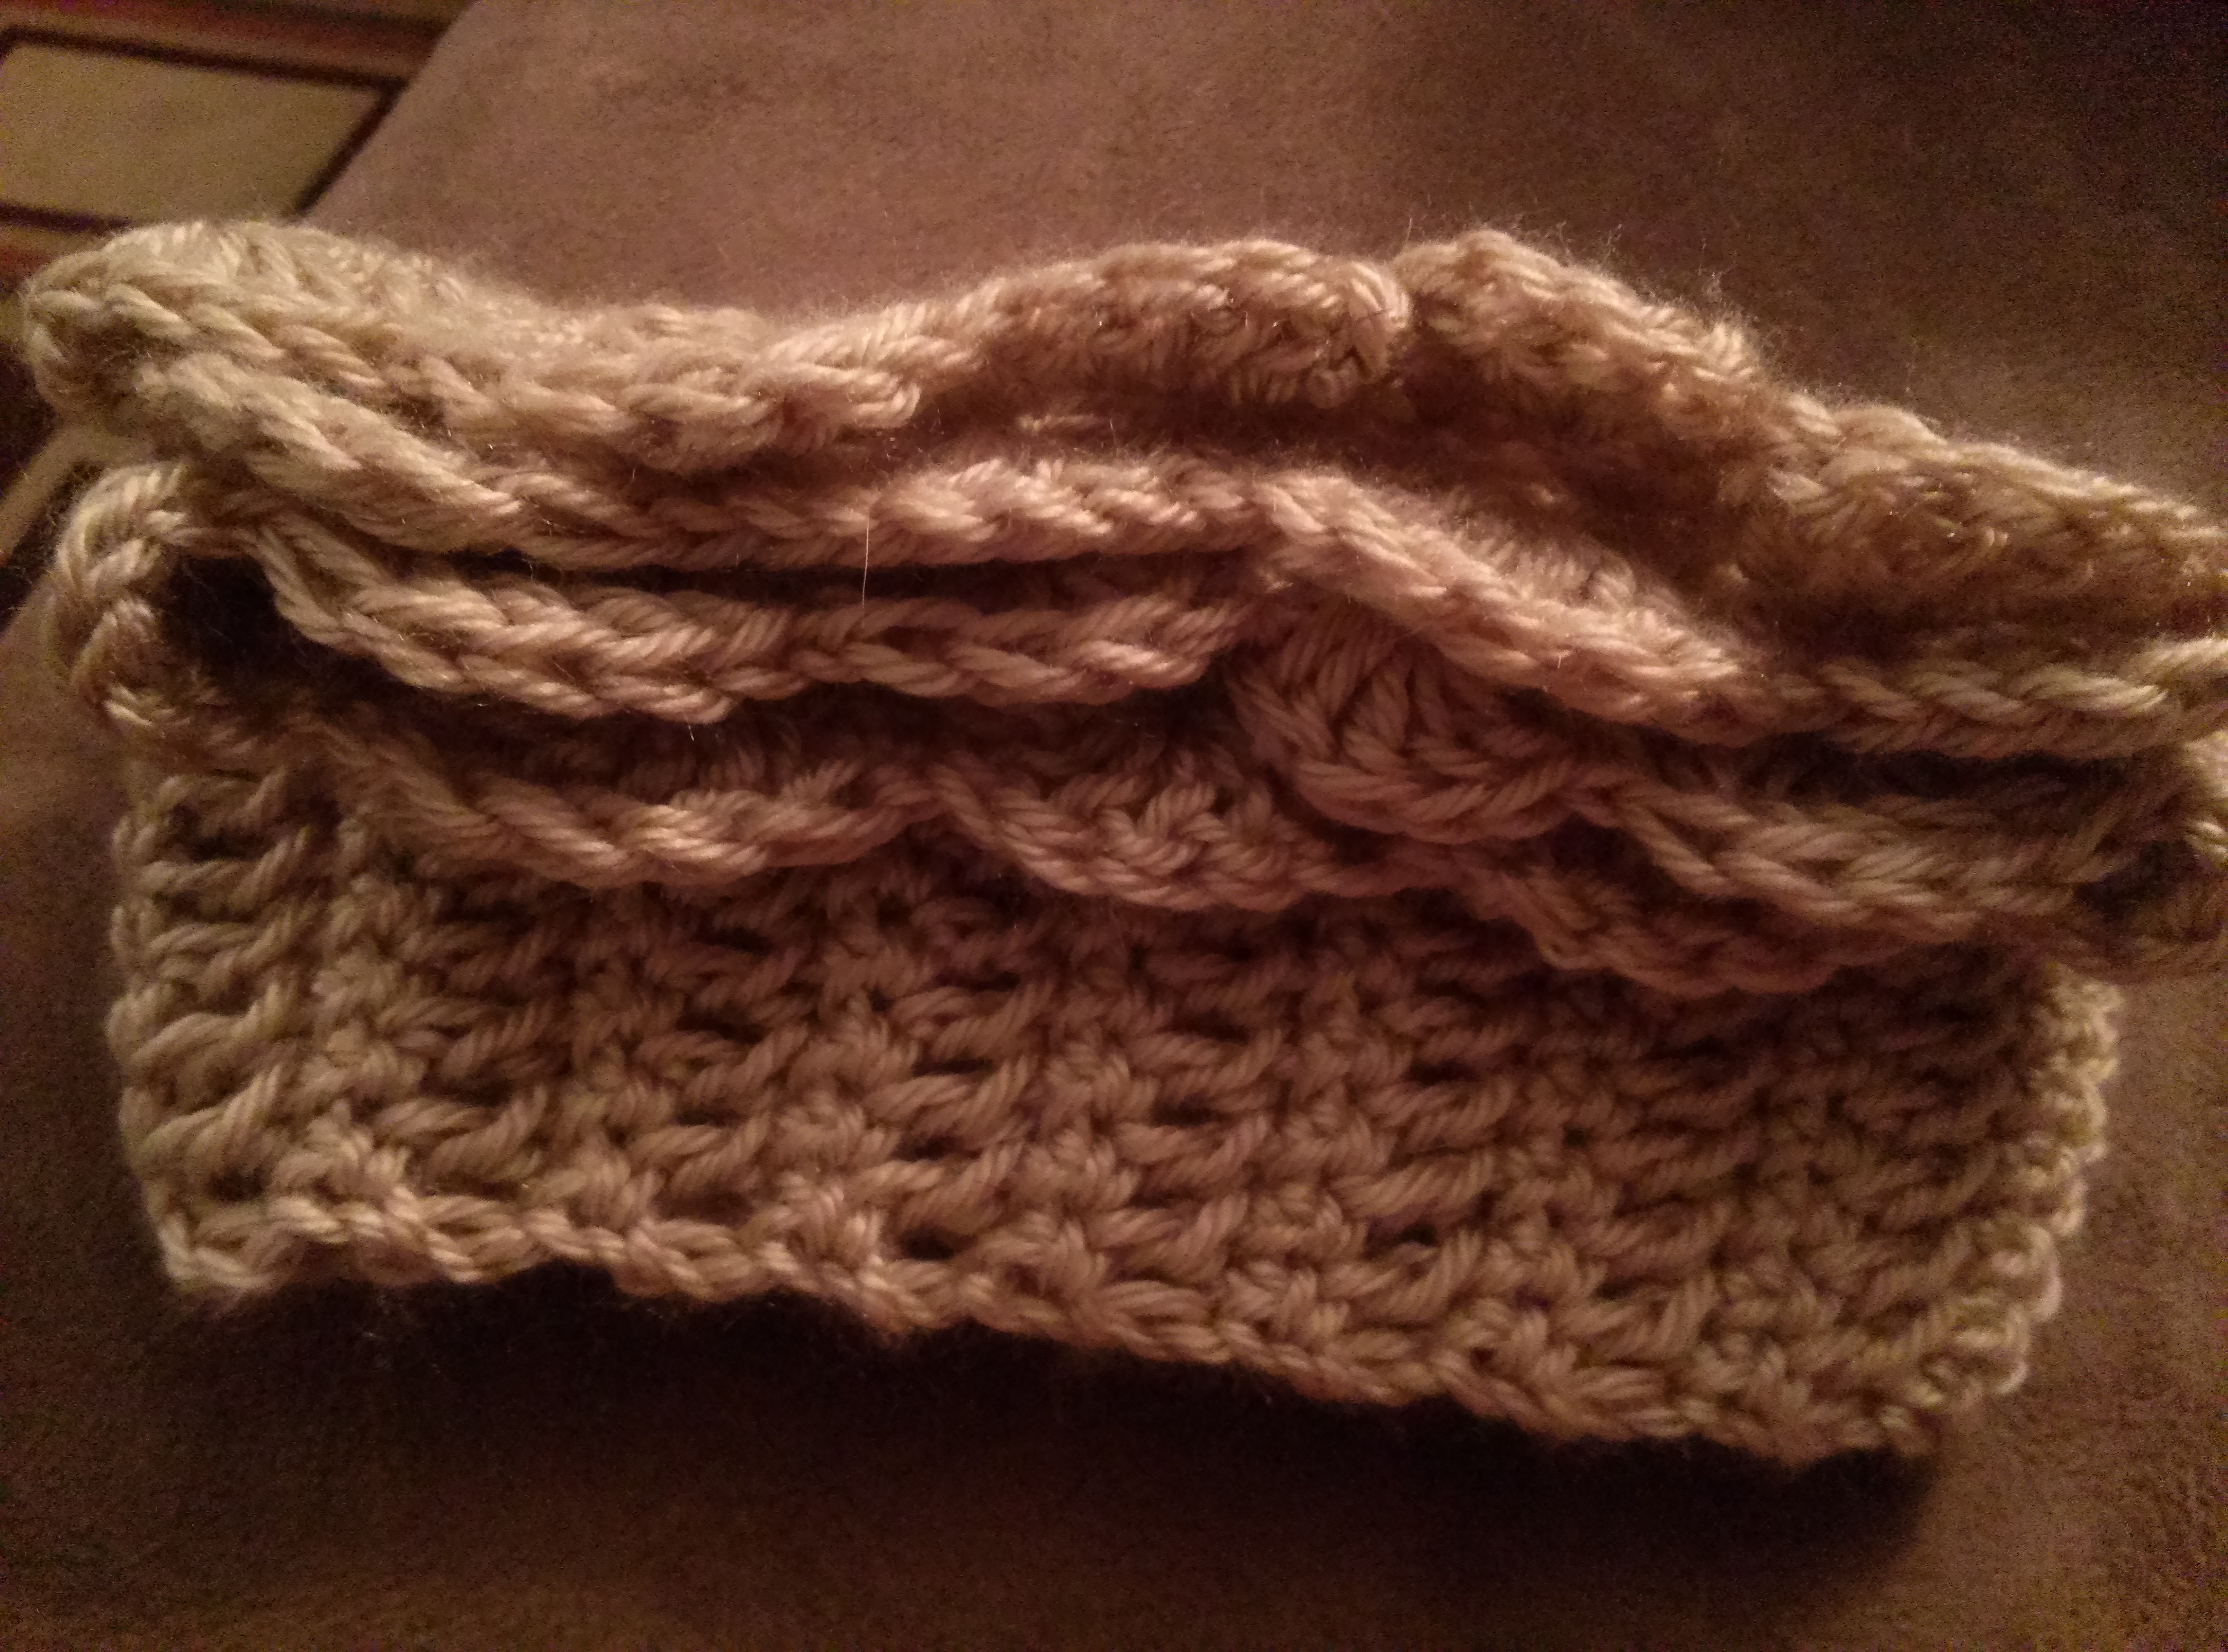
After you braid, you will use a darning needle to sew all the ends together.

  2013-12-19 20.48.26

I finished this project in an evening since it is all simple stiches. It is really easy!

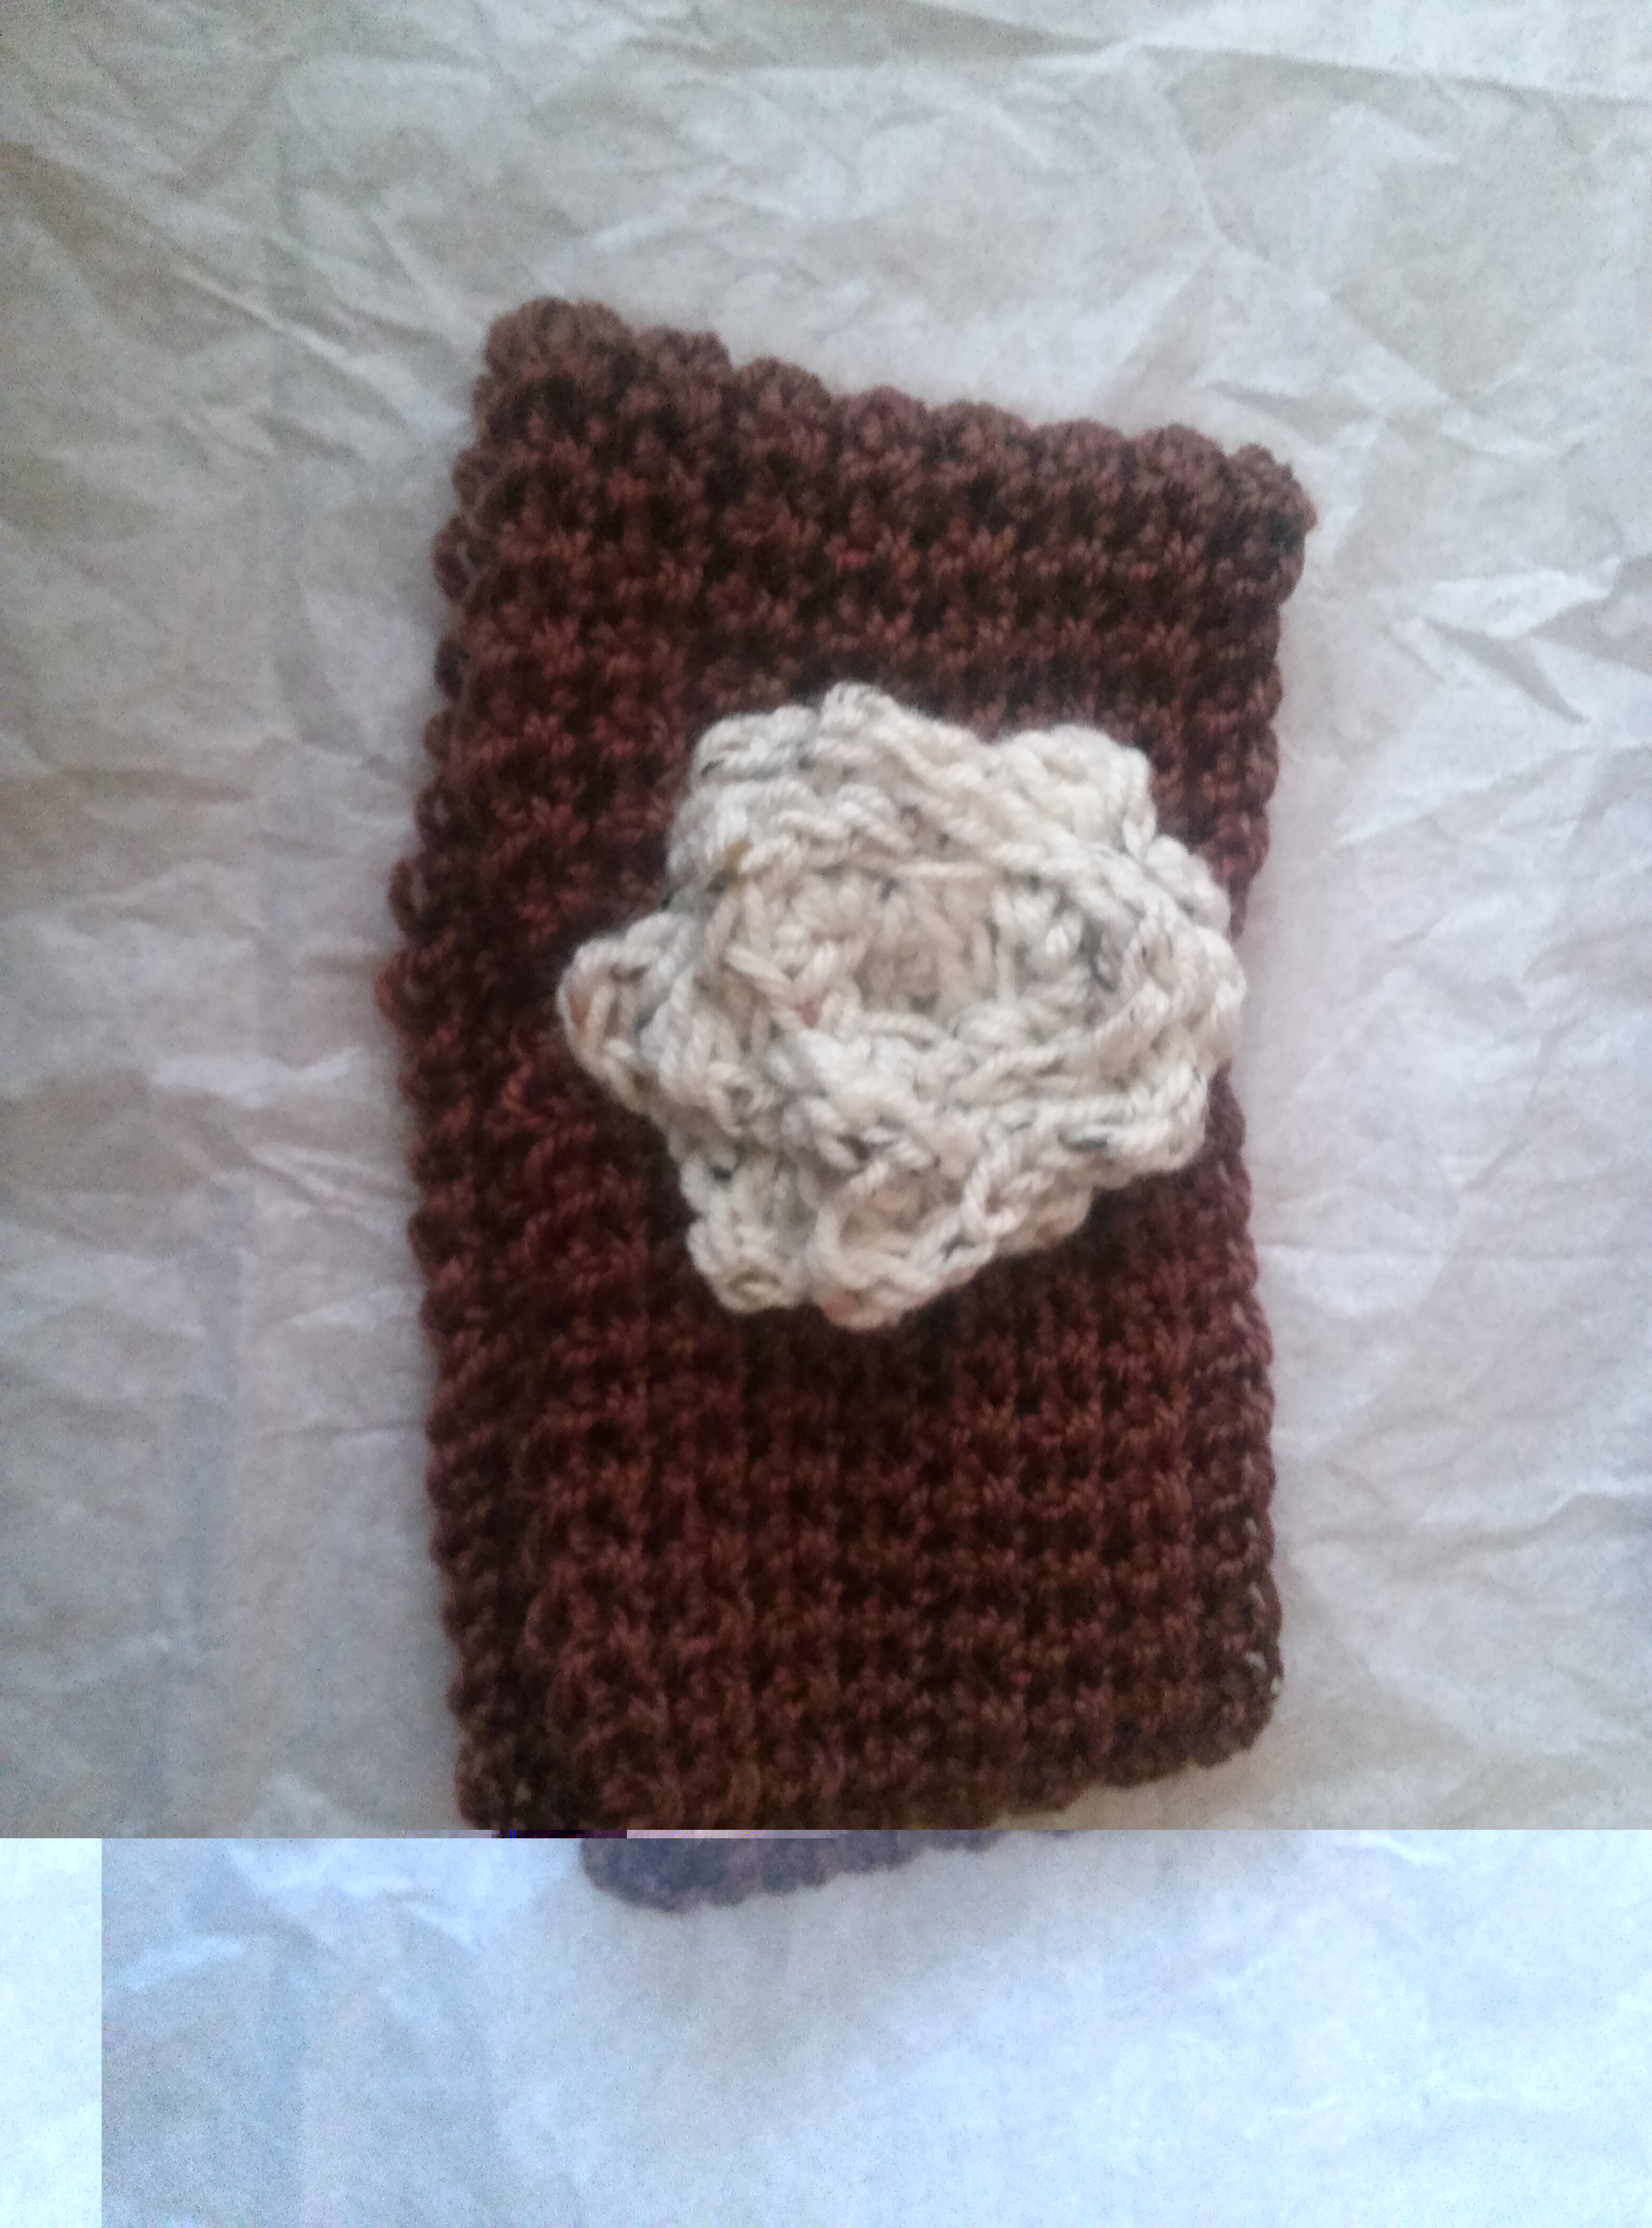
You can vary this design a lot. You could do various stitches, have all the same color, or do three different colors. The options really are endless on the style.

It will make a fairly thick infinity scarf so make sure you make it long enough to double up or short enough that one go around doesn’t look silly.

2013-12-19 20.48.04

Crochet Infinity Scarf: Back Post Stitch

As promised, here is the scarf that matches the boot cuffs I showed on Sunday.

2013-12-21 11.48.10

I did this more than 6 months ago, so I don’t have specifics of how many stitches it took and the like.

I do know that I learned how to do the back post stitch! A friend of mine showed it to me, but here is a pretty good video of how to do it.

The only thing I did different is that I did not do a regular double crochet stitch in between each back post. So every stitch across the row was a back post double crochet.

I really like the ripple effect that it gives.

Then I used a needle to sew the two ends together so it became an infinity scarf.

Fairly easy, and it was super warm too because the back post makes it pretty thick.

I am not sure how this stitch would look on a blanket, but on scarves and hats it looks great!

Crochet Boot Cuffs

I really tried pushing myself with my crochet abilities for Christmas gifts. It is about time too. There areso many things beyond blankets that I want to do, but I have some big blanket projects I need to finish first before the semester is over.

This project was fairly simple. I wanted to make boot cuffs for my sister in law since she wears boots all the time. This pattern was a good one to follow.

My one recommendation is to make sure you don’t make it too tight. Measure your leg with jeans on to make sure they will go over your pants.

2013-12-21 10.52.43

I crocheted the bodies first like this.

2013-12-21 10.56.20

Then I used a needle to sew the ends smoothly.

2013-12-21 11.07.04

There you can see the ruffle.

I didn’t get a final picture of them. Apparently in my haste to get all the gifts done, I took this one above and forgot a nice finish photo. Whoops.

This is what they look like with boots from the site.

ravelry.com

I made a scarf that matched, and I will be showing that later this week.

I hope that you had a great weekend.

The Whitener household definitely is ready to put this last week behind us. (We are lovingly referring to it as the week we would like to forget.)

It is a new week though, and honestly it can only go up.

Have a wonderful Sunday!


Crochet Headbands

I have an announcement.

I have succeeded in crocheting something that wasn’t just a straight line!

I crocheted headbands for my adorable little nieces. I did several variations of them.

For all of them, I crocheted just straight rectangle strips. I either did the whole thing in single stitch or double crochet. It just depended on the type of yarn I used.

Then I used a large darning needle to sew the ends together. This is a first for me in my crocheting experience, so I say that is a win for trying something new.

Then for two of the headbands I did flowers. YES to learning beyond the straight line! I used this pattern. It was really easy to do, or I am just getting much better at this crochet thing.

2013-12-21 10.49.18

The pieces before.

Then you just sew the flower onto the headband strip.

2013-12-21 11.13.50

The finished pieces.

2013-12-27 10.59.20

IMG_0226

She didn’t realize that it goes over your ears. She also did not want to be my model anymore.

With the other two, I just wrapped yarn over several times to scrunch a piece of it. This is great to cover the seam and the ending stitches, which I always seem to make a mess of. This way is much easier than the patch I made for my first headband attempt.

2013-12-27 10.59.08

See how it is just wrapped around there?

2013-12-28 13.50.57

I made all of these in about an hour.

IMG_0643

Addison wanted to use it as a blindfold.

Since they are for kids, you do not need a lot of yarn. Although, I had to redo one because I misjudged how large my nieces heads are. They are still babies to me!

I happened to use left over yarn from other projects for all of these. Score!

They turned out really well. And since they don’t take up much yarn, I think I have found an easy thing to do with that yarn that I can’t use for blankets. Anyone want one?

I hope you all have a great first Monday of 2014!

Crocheting Props

A couple weeks ago, I was fortunate enough to photograph some friends of ours and their sweet family. I made this blanket/throw in a few days for the family shoot. With all the military families around here, I felt that I could use this as a prop for various shoots.

IMG_9933

I ended up using the family’s blankets more than this one, but I am glad that I have it now for the future.

IMG_9931

Hobby Lobby had this “Old Glory” yarn which made it really easy to make an American blanket without switching skeins. I am all about convenience.

I did break my rule of not trying a new stitch or pattern, but I was trying to make it simple so it wasn’t the main part of the photo. I also needed to make it quick, so I alternated a single stitch row and a treble stitch row for the entire blanket. With the color switching yarn, you don’t want a lot of details anyway because it can get lost lost.

IMG_9930

And per usual, when I try to take my blanket photos, Grace feels the need to be a model. She is pretty cute.

IMG_9918

This is the only time I can get her to sit for photos. Crosby was no where to be found, or really just taking advantage of having the couch to himself.

IMG_9923

To end, I leave you with some crafty videos from Ellen. These are my two all time favorite segments from the show!

Happy Hump Day!