
One of the greatest things about my husband is his wit. He says things without missing a beat. I admire this skill because half the time I think of clever things hours after they are relevant to the conversation. So I am usually left in awe in the wake of his commentary.
We recently went shopping at Old Navy to change up Tom’s normal wardrobe of t-shirts and gym shorts. I just want to make it clear this was his choice not mine. And this gem of a conversation occurred as we went through every V-neck display. (He even mistakenly went through the boys section before he realized the sizes.)
All Tom- “I love v-necks. I can wear a v-neck to church or to bed. V-necks are the gauchos for men. A step in the right direction for clothing gender equality.”
Tom proceeded to buy at least 5 different v-necks. I lost count as I carried them all.
I love his v-neck obsession!
I am always looking for new ways to store things such as Tom’s v-necks, so I had pinned these pictures ages ago hoping Tom would be able to re-create something like it.


And sure enough, he did! Thanks to Tom’s mad carpentry skills, we are no longer sleeping on the floor. Grown ups!
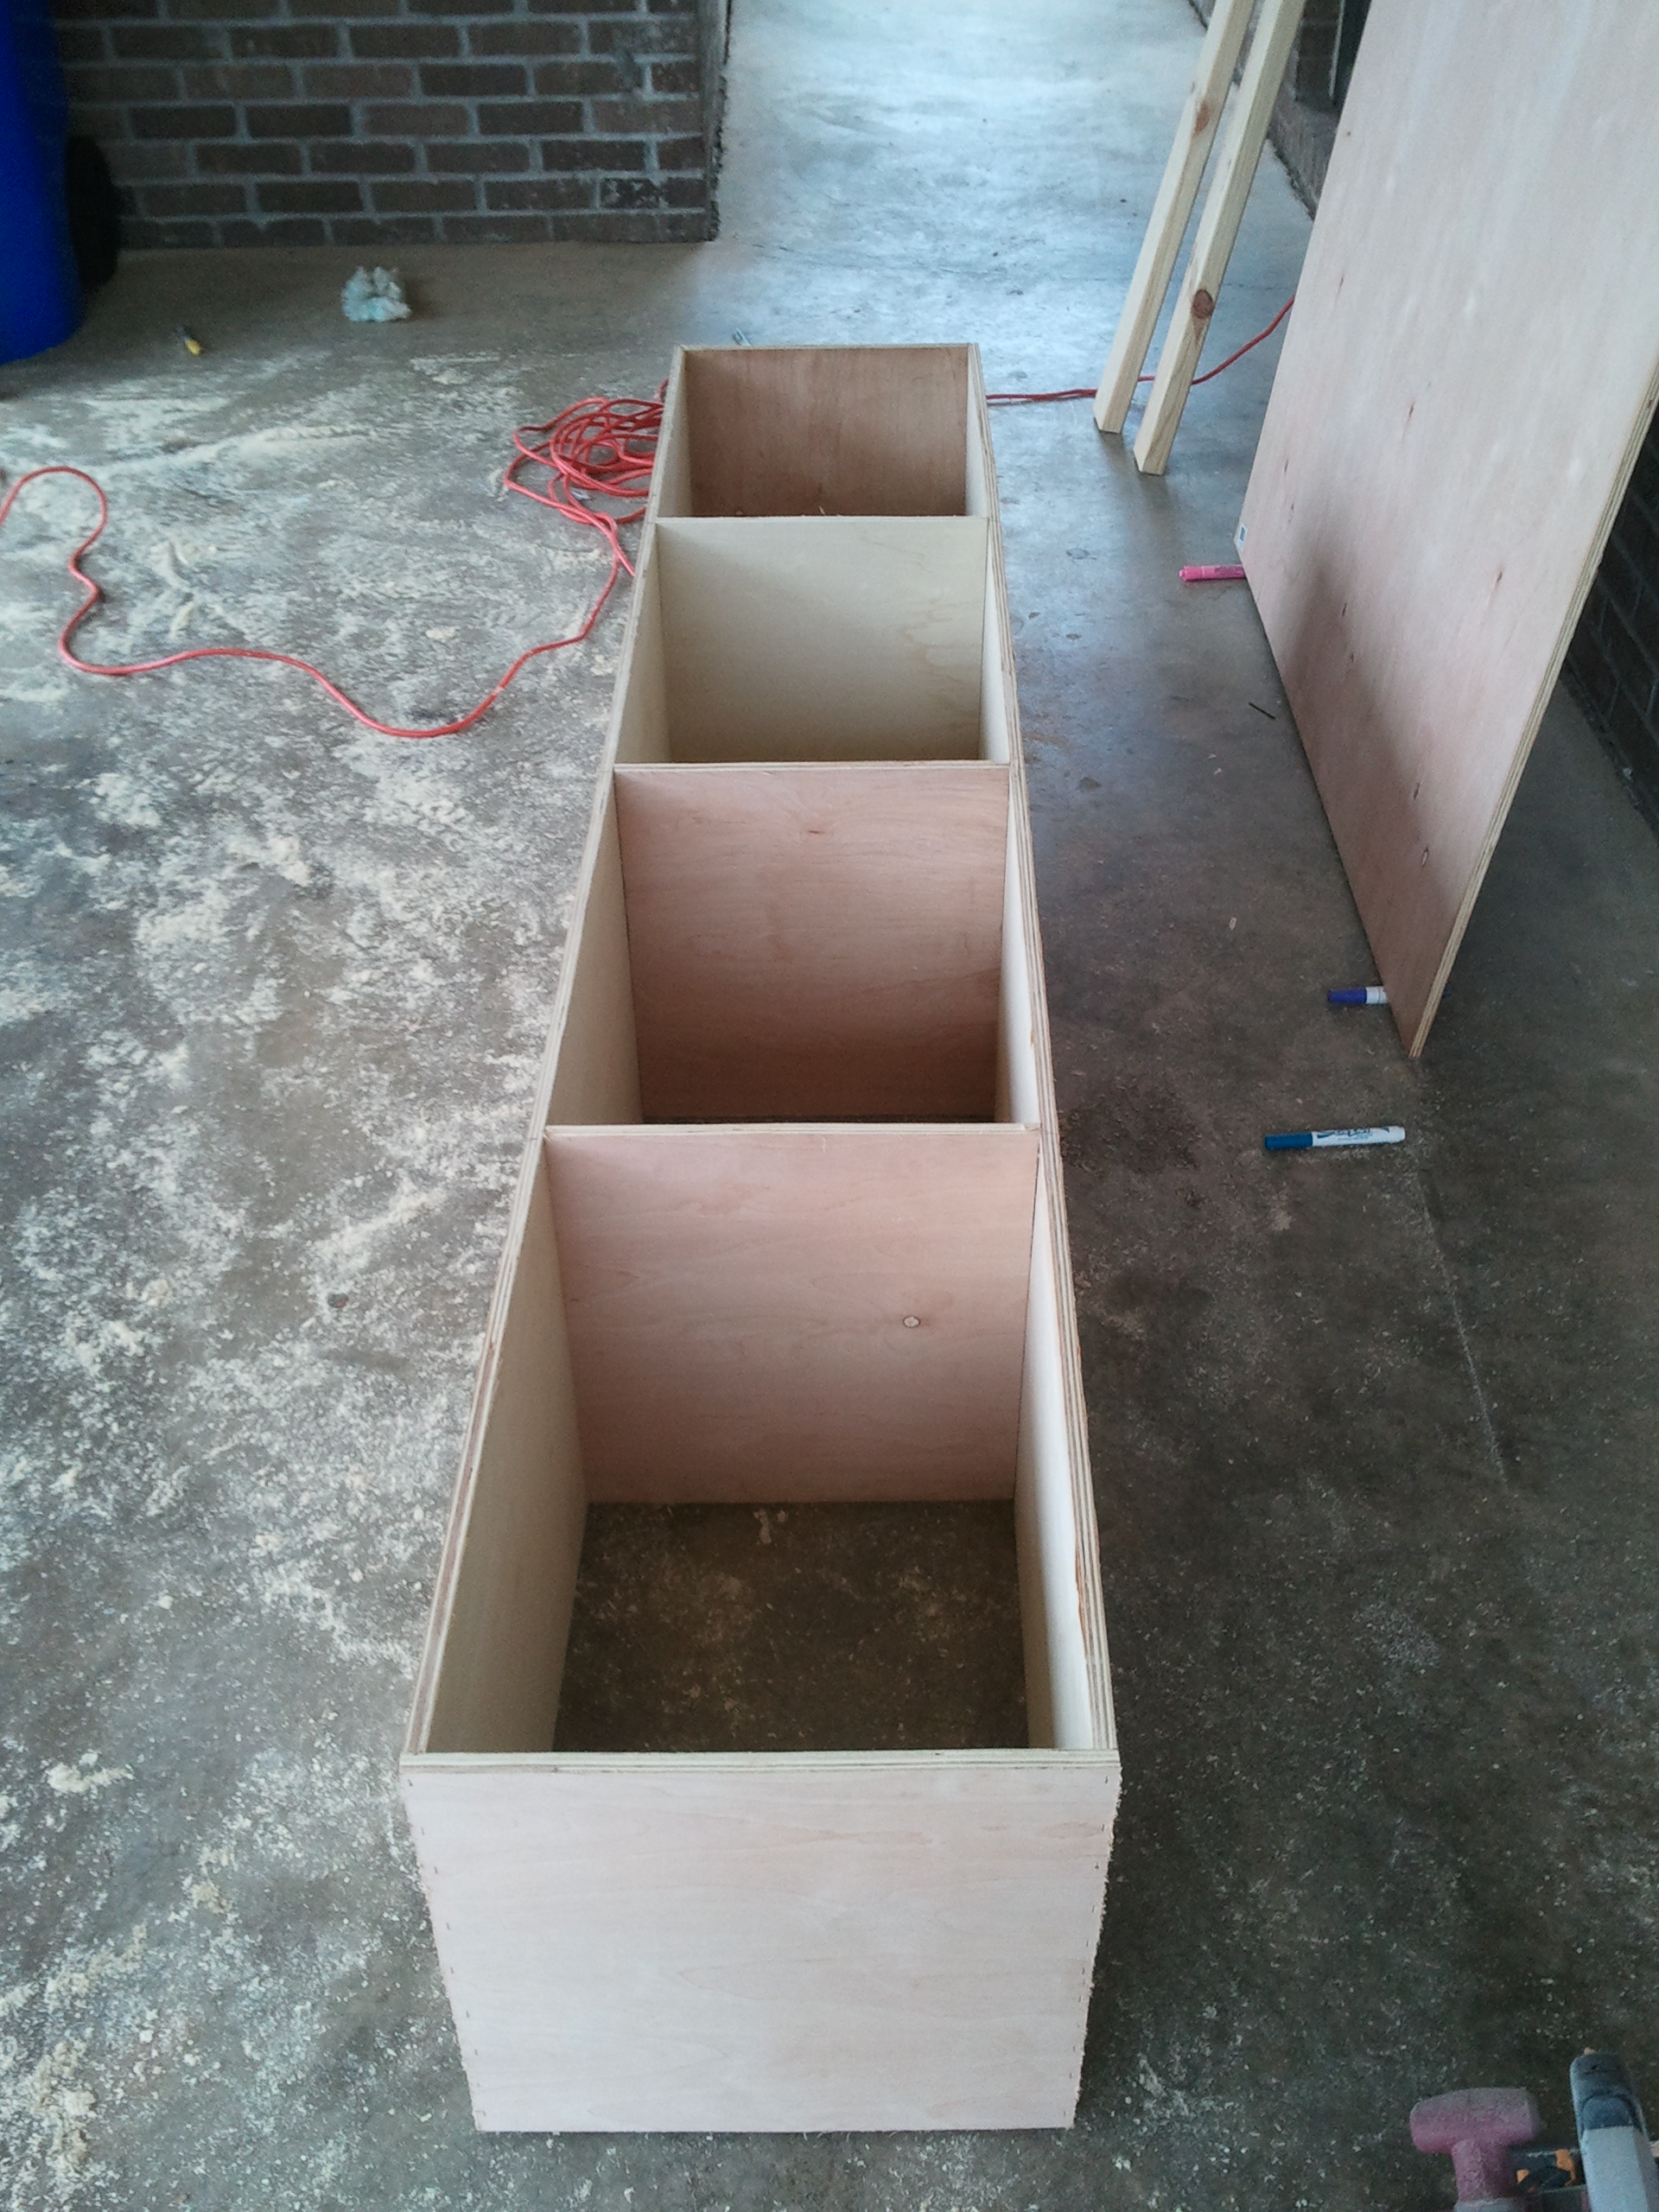
He built the two box units for the sides out of plywood.
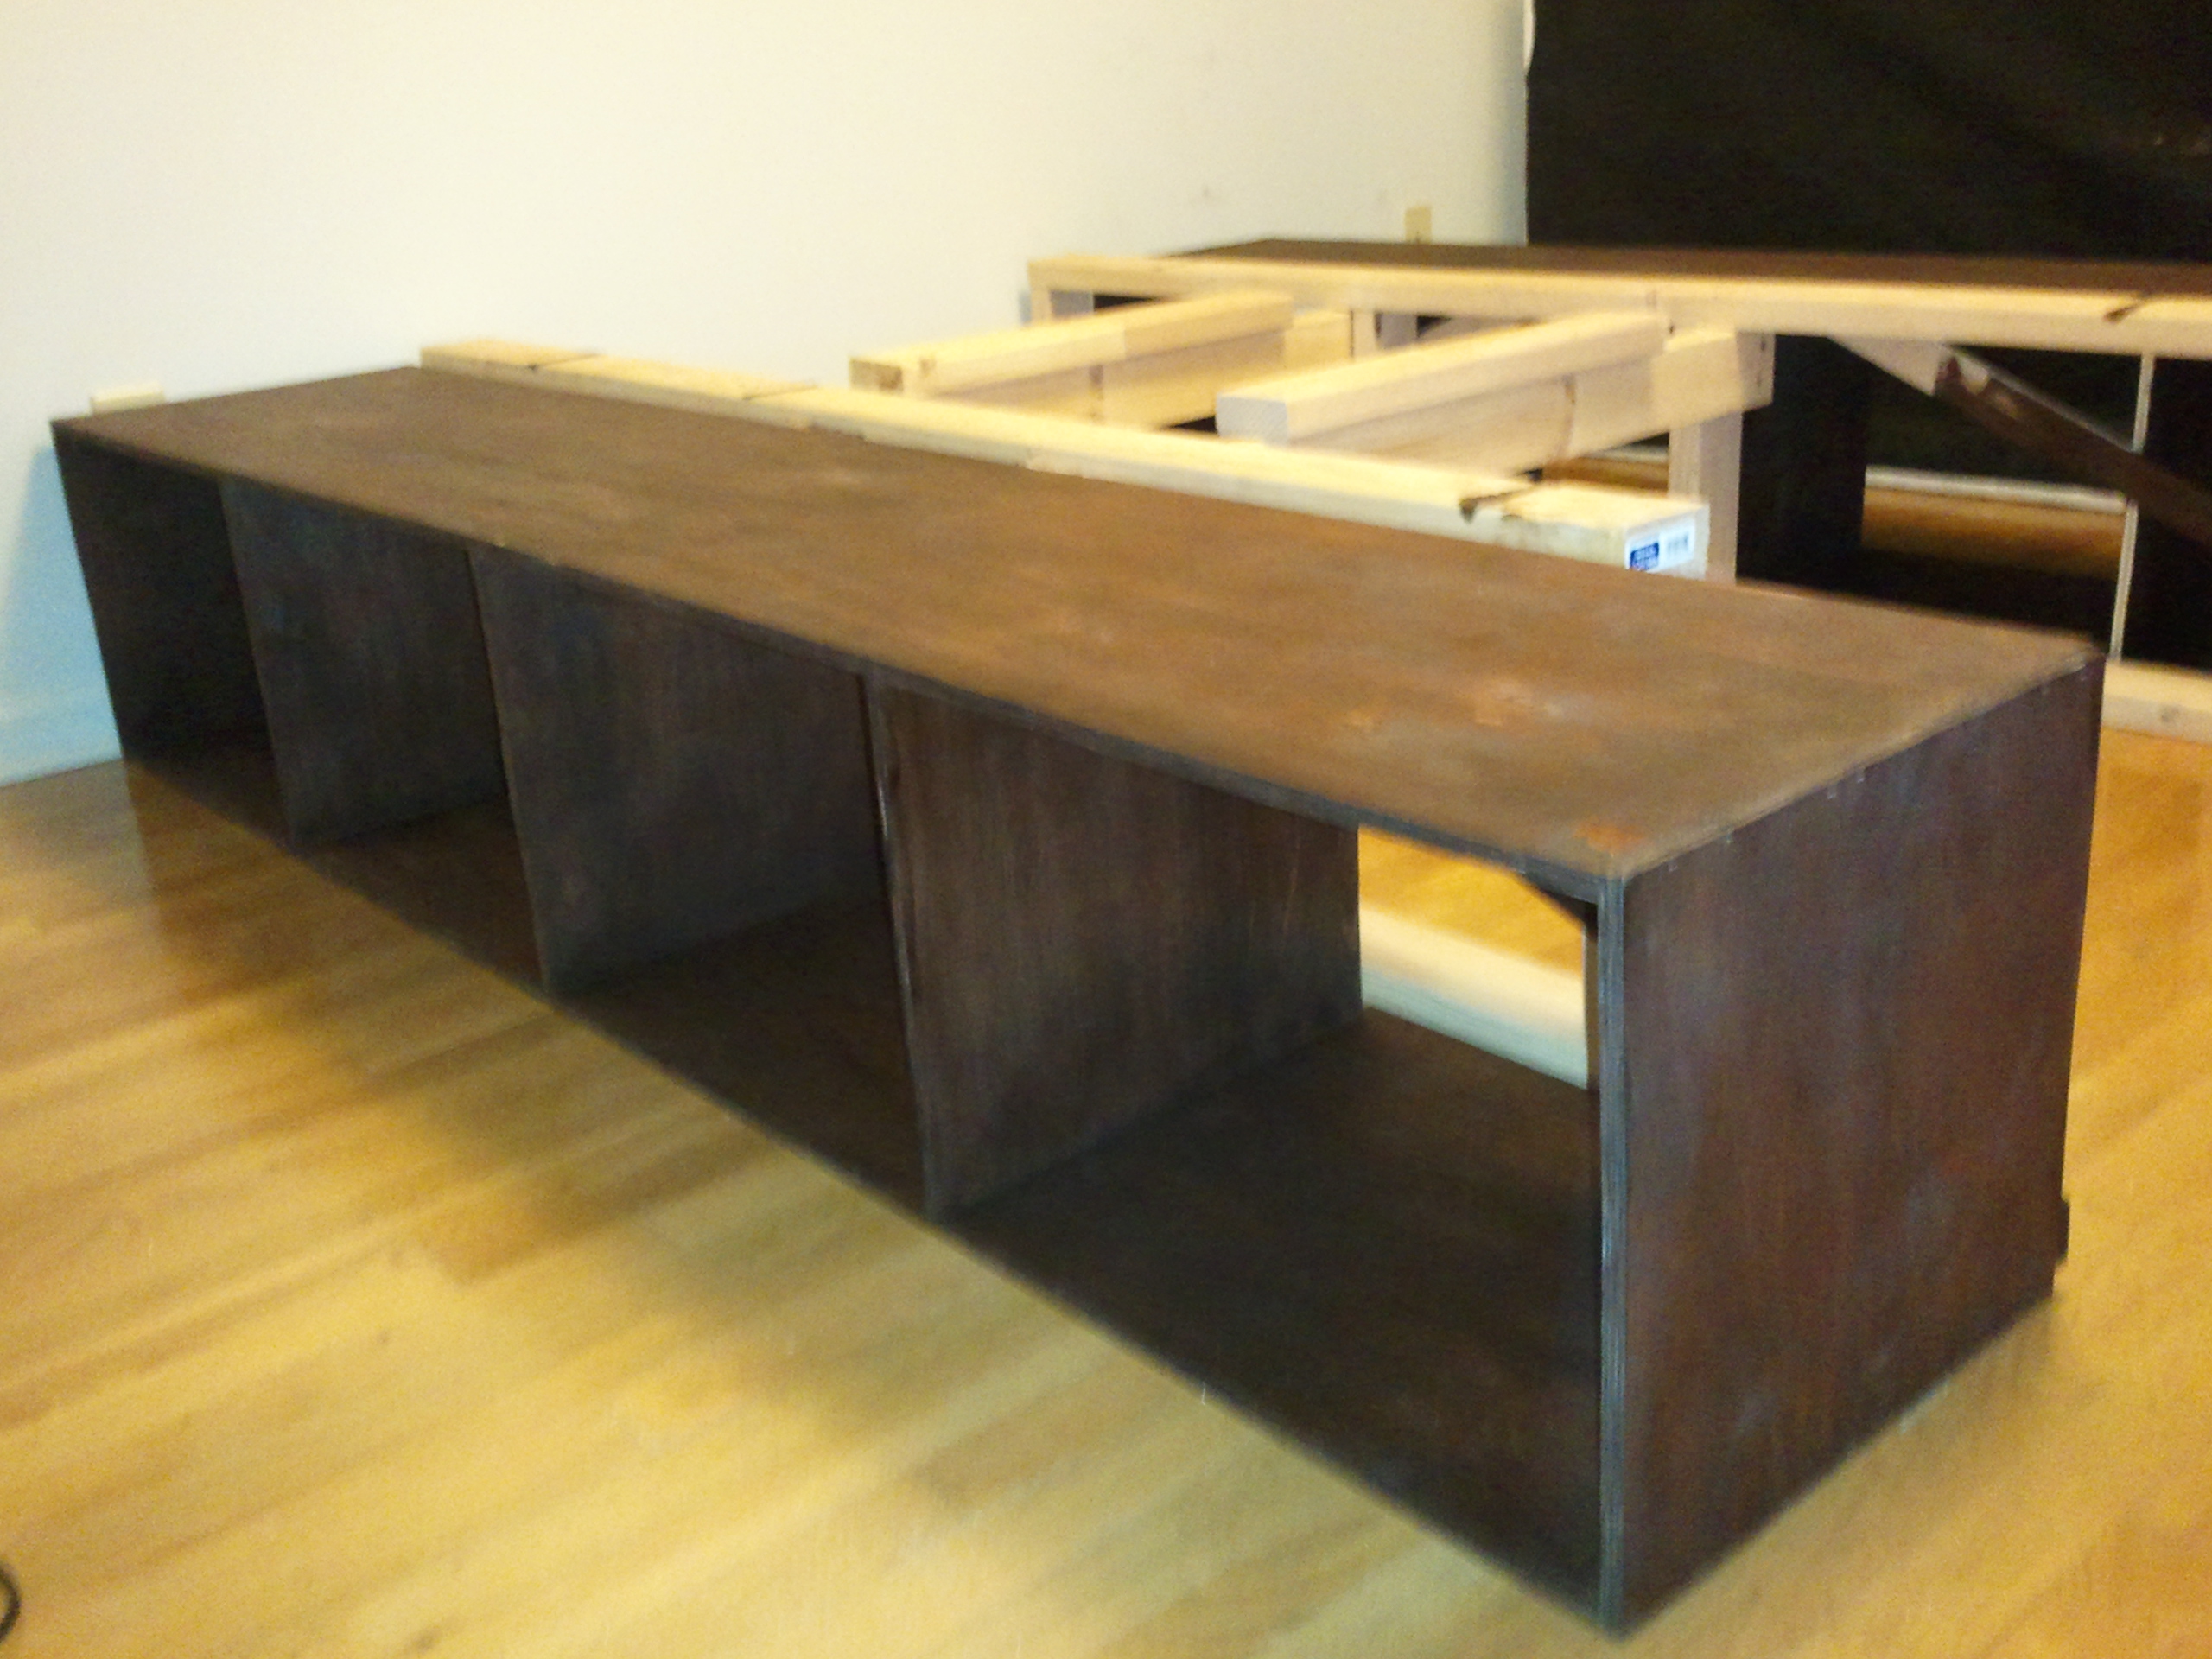
Then he built the middle part to brace the bed.
Only the outside boxes needed to be stained.

We made it so we can still slide crates underneath the bed for even more storage.

We bought these simple cloth baskets at Walmart to put in the side cubby holes.

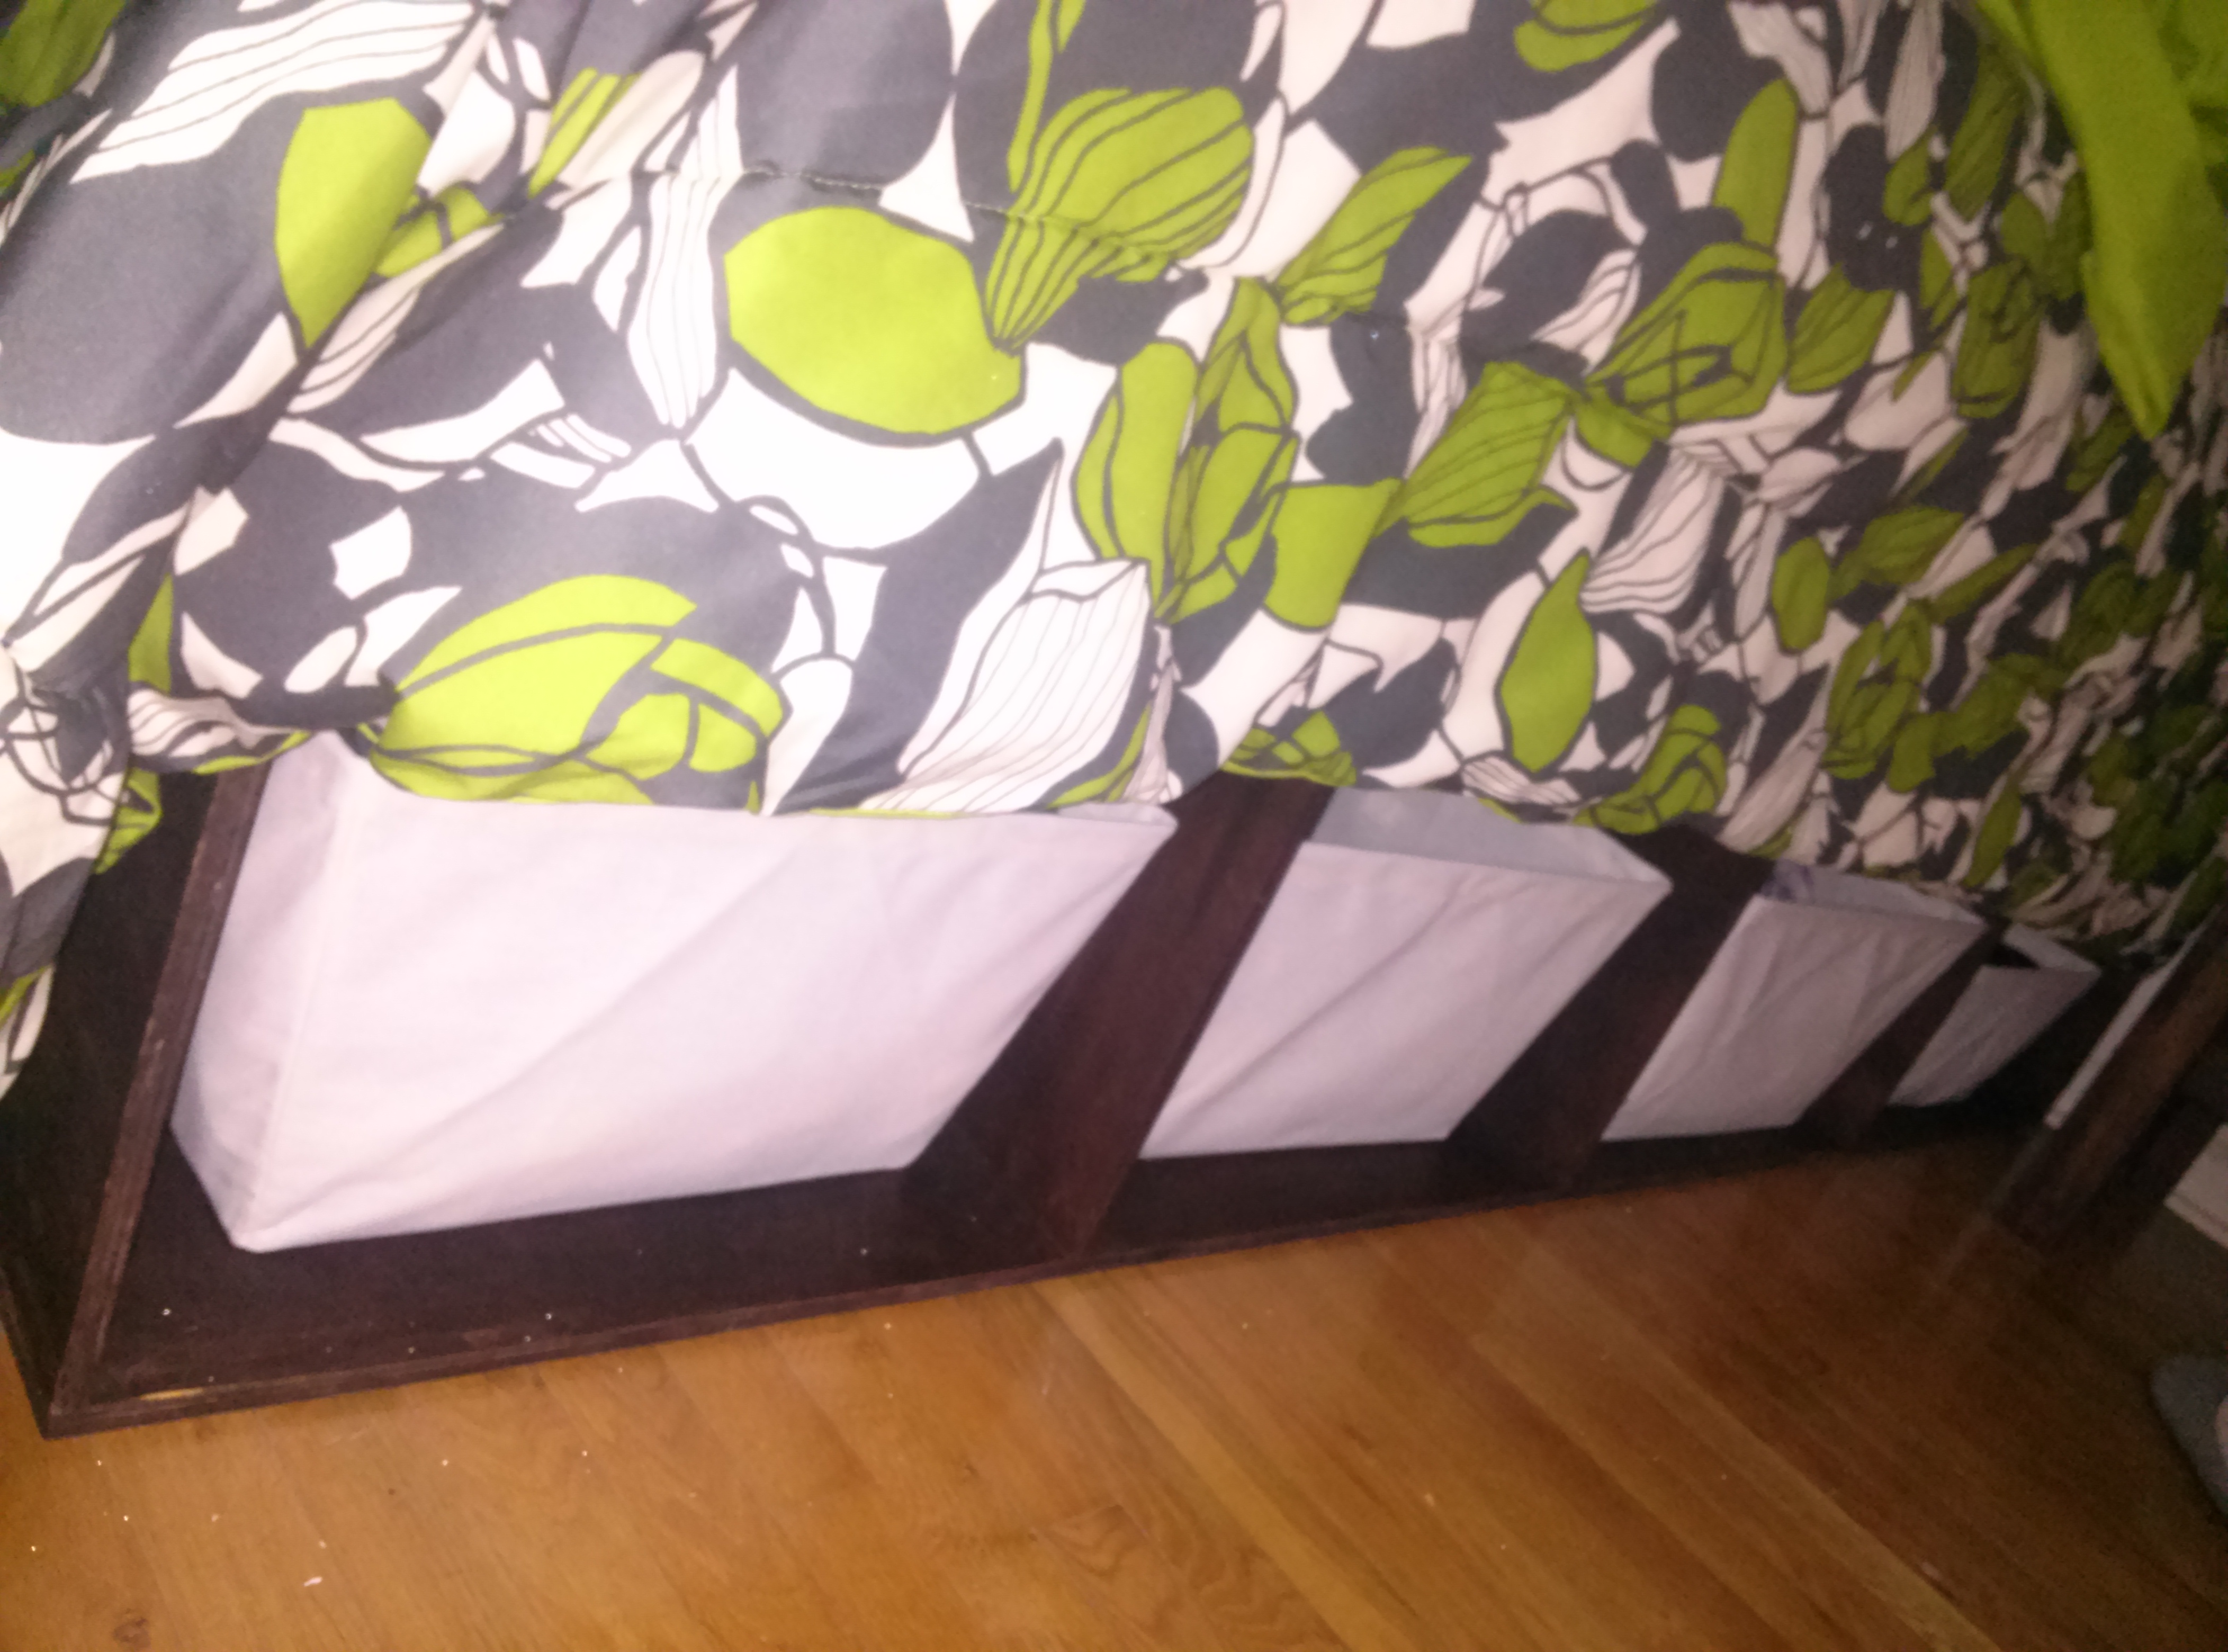
We still need to figure out what to do to close off the hole in the front because we were going to put a bench there, but that doesn’t leave enough room for us to walk around the room. So we are still thinking about that, but it is not a huge priority right now.

It was an easy design since you just make the boxes with two long pieces for the length of the bed and 5 short pieces for the height you want and to sanction off the cubbies. You can make more cubbyholes by just putting in more short pieces. Also when you are determining the height make sure you take into account how big the baskets are and how big your box springs and mattress are. We used some nicer plywood for these. This is where most of the cost went.
Depending on the size of your bed you may need to build the middle part like we did to make sure your bed doesn’t fall in the middle. Tom just used 2X4s to build the brace as sturdy as possible. This doesn’t need to look fancy since it is never seen.
We have a nail gun which made this job much easier. I am not sure I would want to attempt this with basic nails and hammers.
Now we just need to work on the headboard to finish the room off.
I love our bed!
I hope you all had a great start to the week!

Wow, I love this!! So nice to have a husband who is handy. Are you on bloglovin? I would love to follow you!
It is pretty nice to have a handyman around! I am not on blog loving, but people keep suggesting it. You think it is worthwhile?
Looks great! My husband tries to be a handyman but he’s still in the learning process. I guess I should come up with new projects so he can get better. I agree with Sarah, I would love to follow you on bloglovin’.
Pingback: All Those Monkeys Jumping on the Bed | Army Crafter